Table of contents
1. Requirements
2. Prepare a menu for your guests
1. Requirements
You need to have Guest apps enabled with at least one venue active. If you are not sure whether you have this, please refer to
2. Prepare a menu for your guests
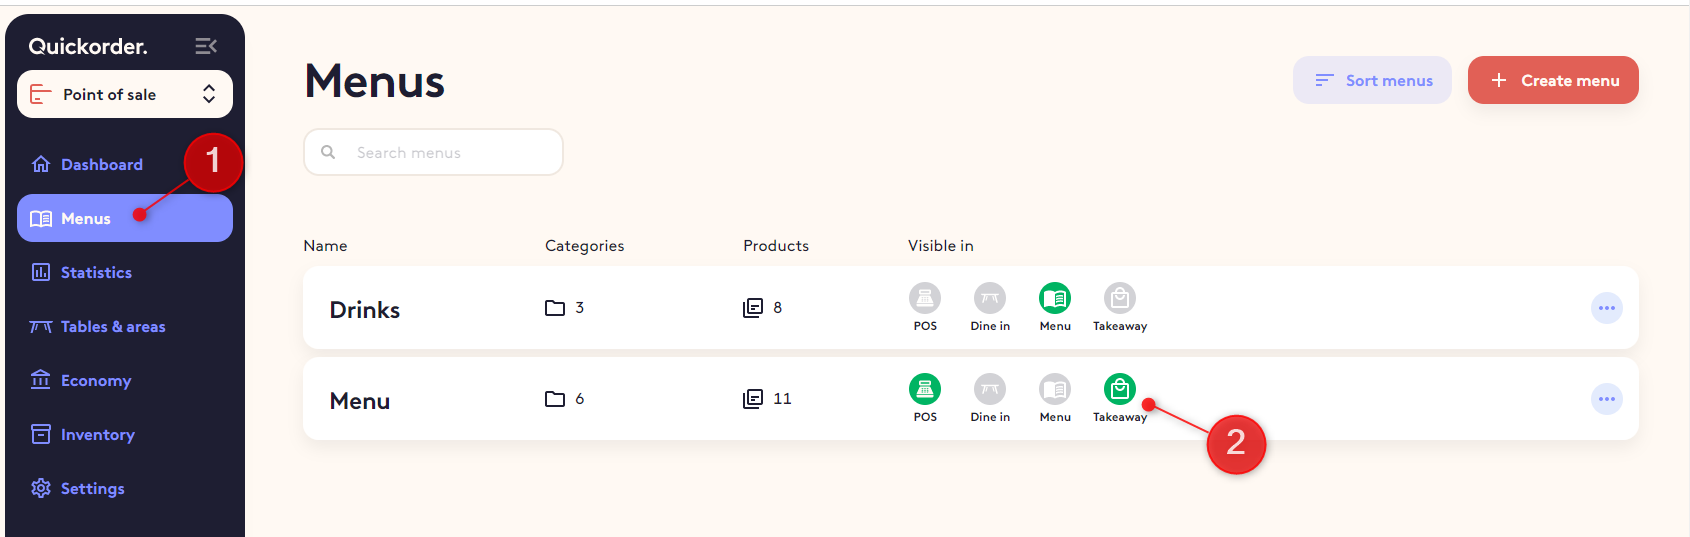
In the Backoffice go to Menu
You can have multiple menus depending on how you run your restaurant. The recommendation from us is to separate the POS menu card and the menu card you show to guests. Do the following:
- Create a menu card for your POS
- Copy this menu card by clicking the three dots at the end and choose 'Copy'
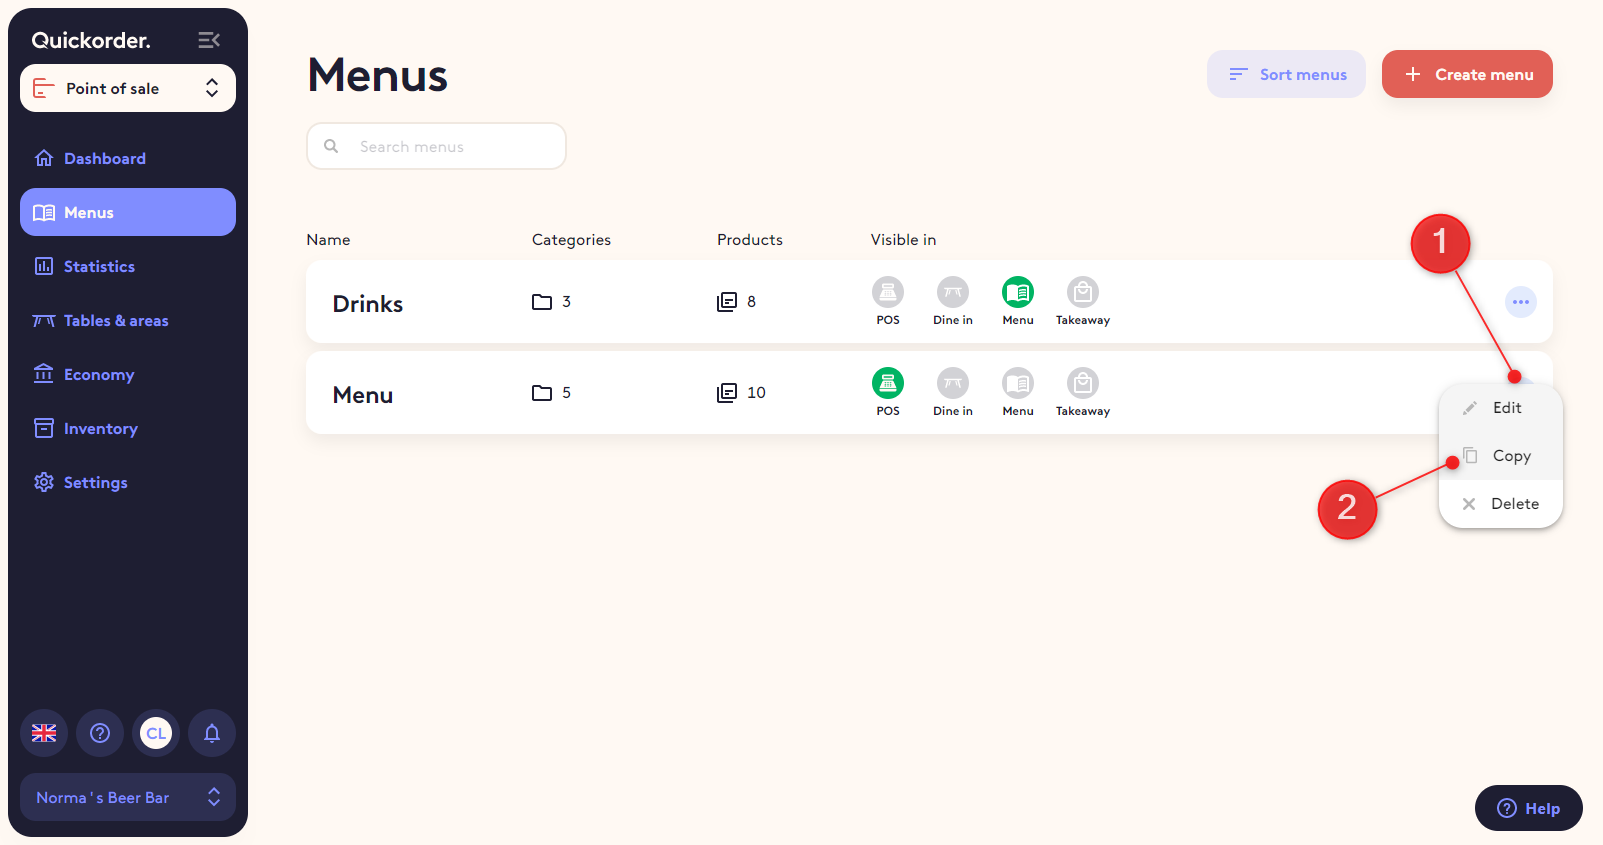
A message will show to inform you that you are about to create a copy of the POS menu card with 'referenced' products. This means that if you update a product in one menu that product will also be updated in the other menu.
Once you have your new menu
- Remove the products that you do not want to show to guests. Examples could be special discounted items for employees etc.
- If you give guests a bag for their food you can take money for this
DK restaurants only: Danish law require you to take at least 4DKK for a bag with handle. If you give out bags with handles you MUST follow the procedure below
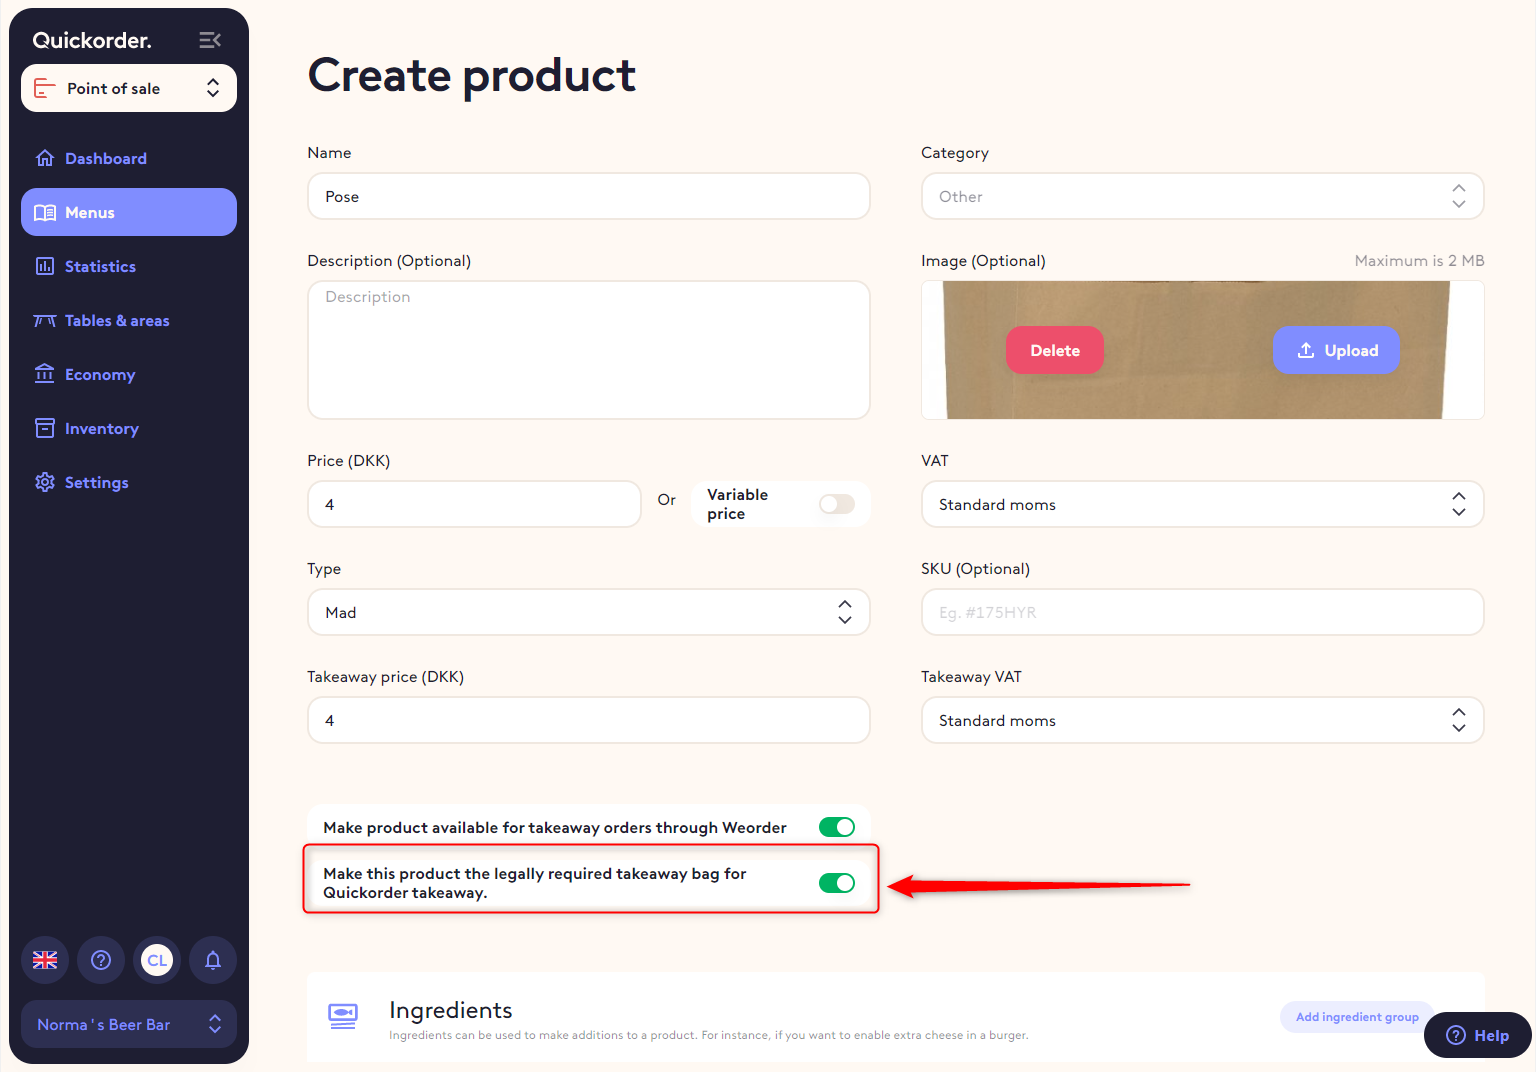
- Create a new product in your POS menu (not the takeaway men, since you don't want this product as something the guests can choose themselves) and name it bag (or something similar).
- On the new product enable the setting pointed out in the screenshot below.
Once you have a satisfactory menu you can move on to the next steps below.
3. Enabling takeaway
Step 1: Venue level
In the Backoffice, go to Settings - Venues. Click on the Menu card button for the venues where you would like this option to be used.
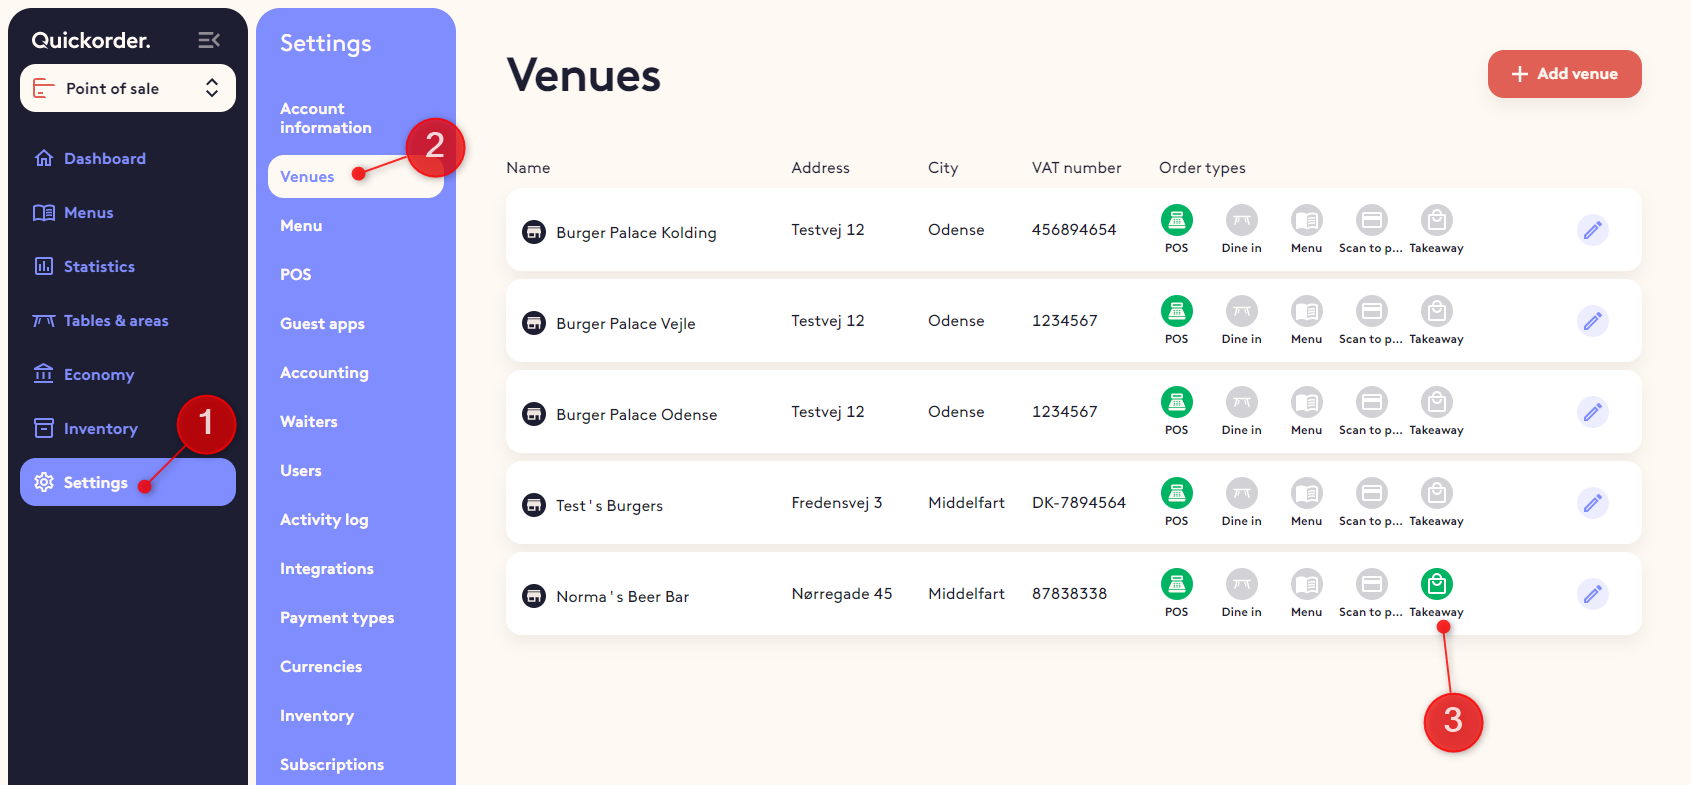
Then edit the venue

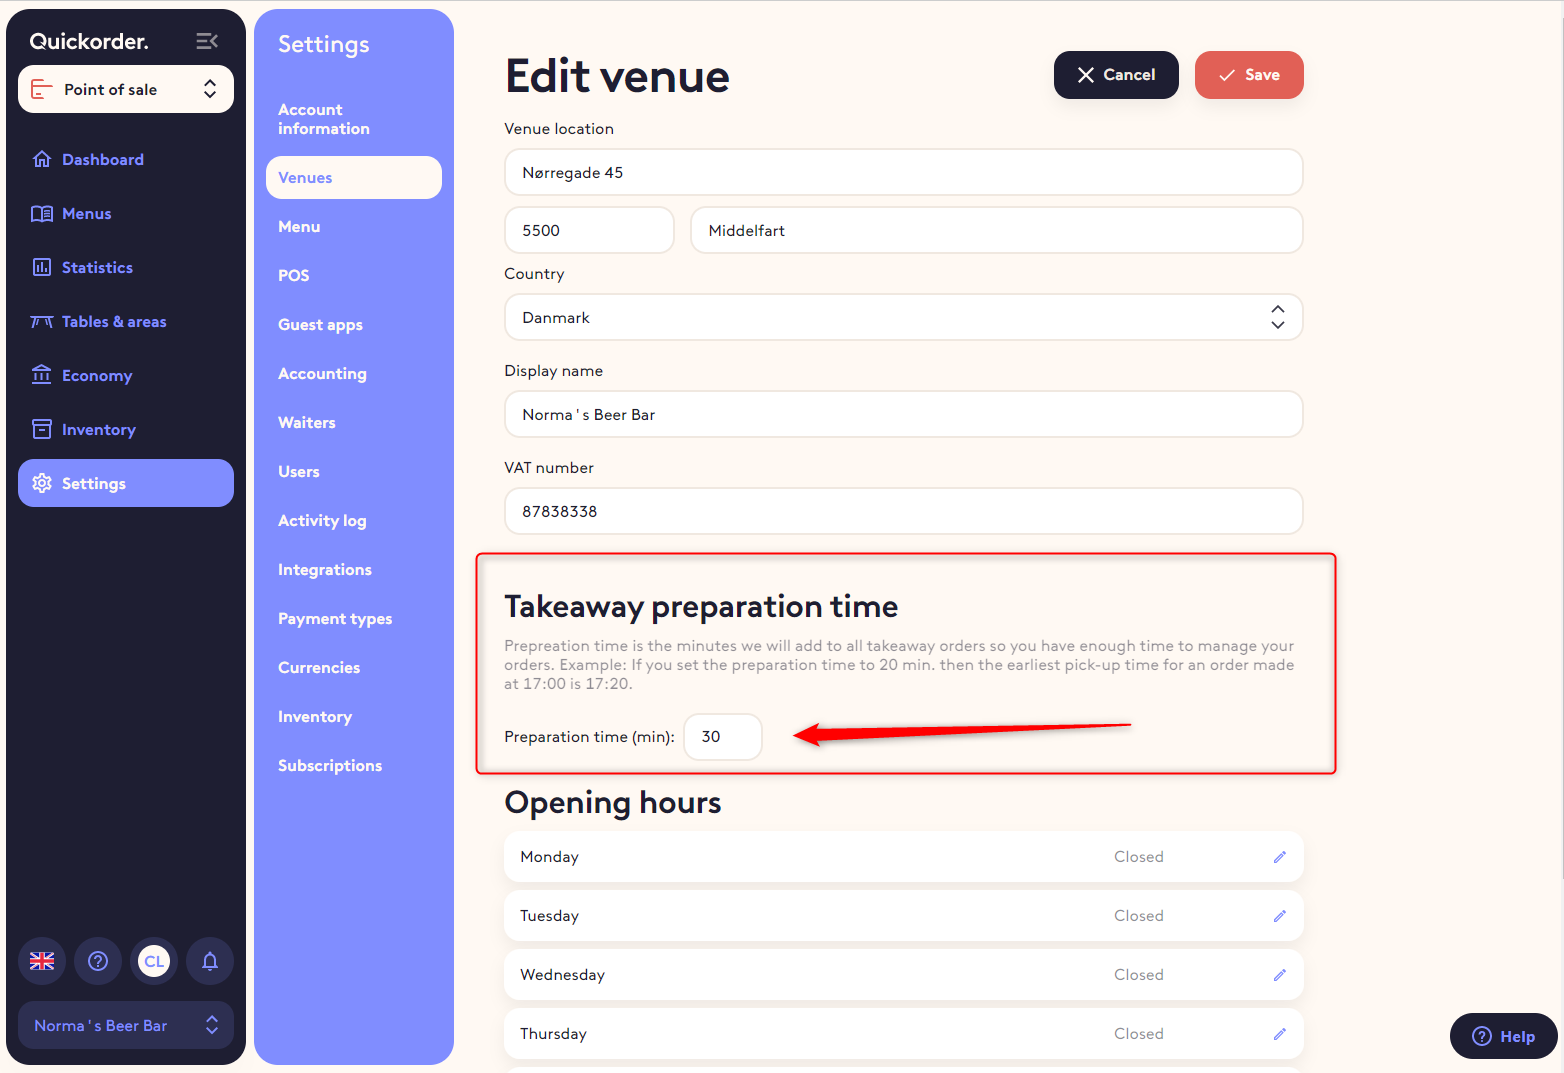
and update Takeaway preparation time.
Preparation time is the minutes we will add to all takeaway orders so you have enough time to manage your orders.
- Example: If you set the preparation time to 20 min. then the earliest pick-up time for an order made at 17:00 is 17:20.
Step 2: Menu level
In the Backoffice, go to Menu and click the Menu card button for all the menus that you would like to be displayed for takeaway
Step 3: Set up pick-up hours
Edit the menu card you have enabled takeaway for
There is a tab called 'Takeaway (Pickup hours)'. Here you can set up when guests can choose their pick-up time in the app.
Note: A day starts from 05:00 in the morning to next day at 05:00
Note: Please remember that your staff needs time to prepare the first order of the day.
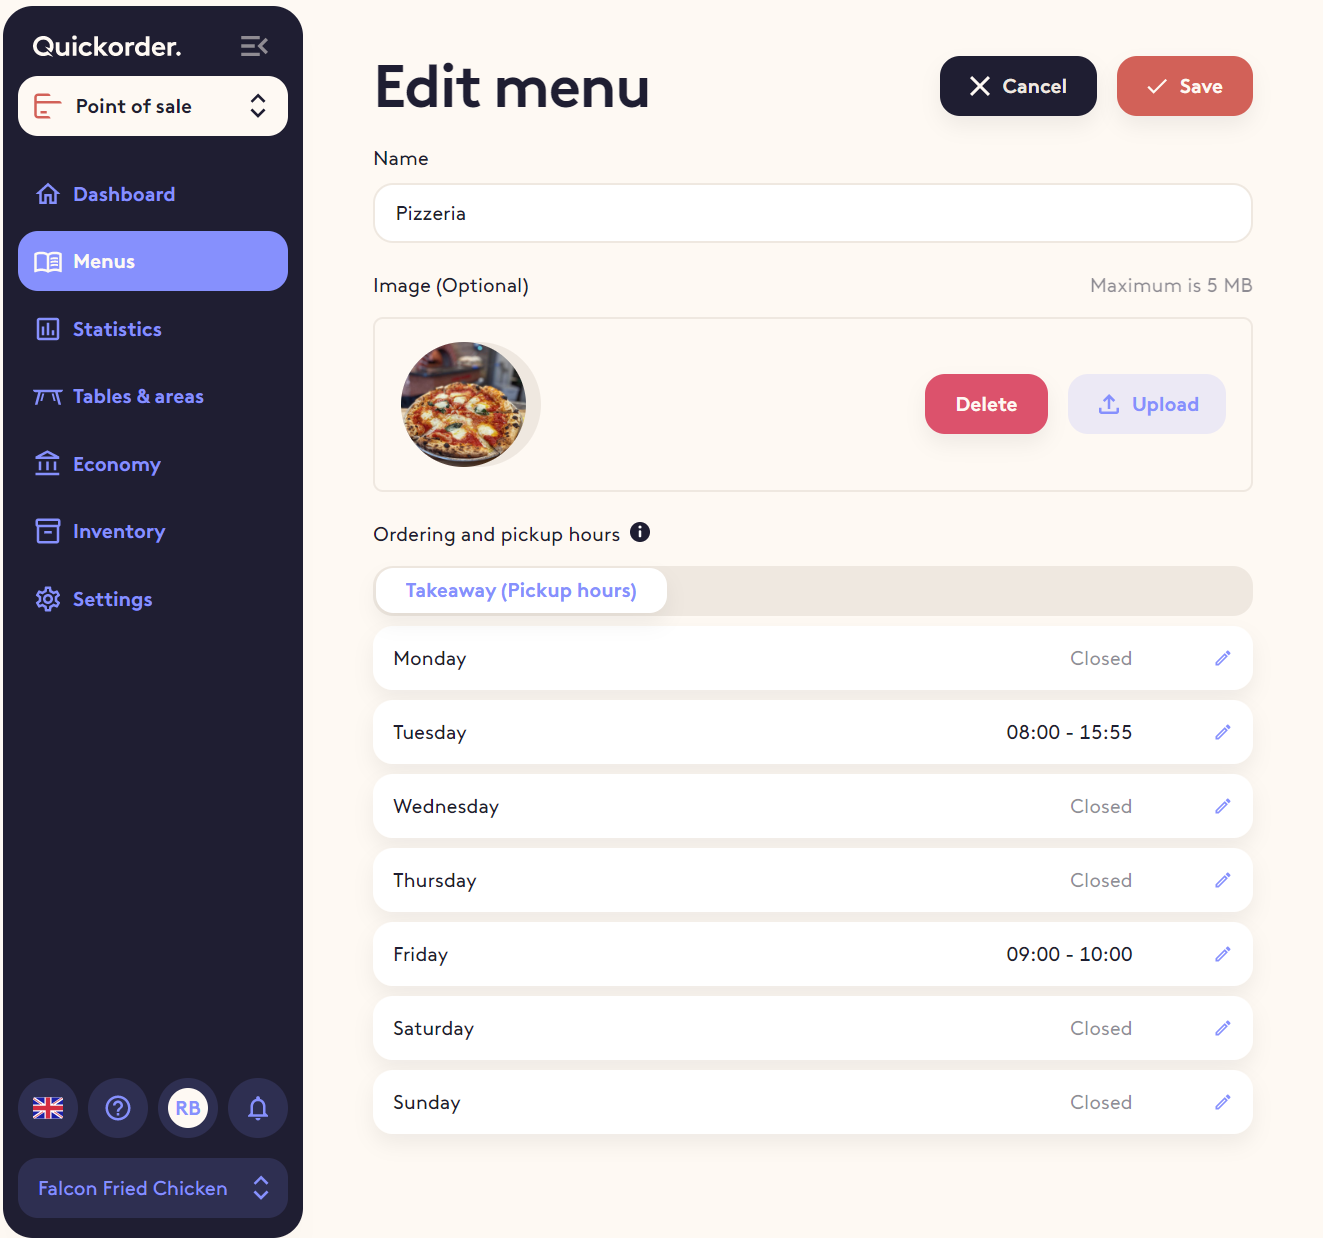
When you have updated the Pickup hours click 'save' in the top of the screen
Step 4: link to smiley reports (DK restaurants only)
Danish law require you to link to Smiley reports in your app.
- On the venue page there is a field where you can paste the smiley report URL. Go to
- Go to https://www.findsmiley.dk
- search for you restaurant
- paste the URL to the reports in the field on the page
- Save
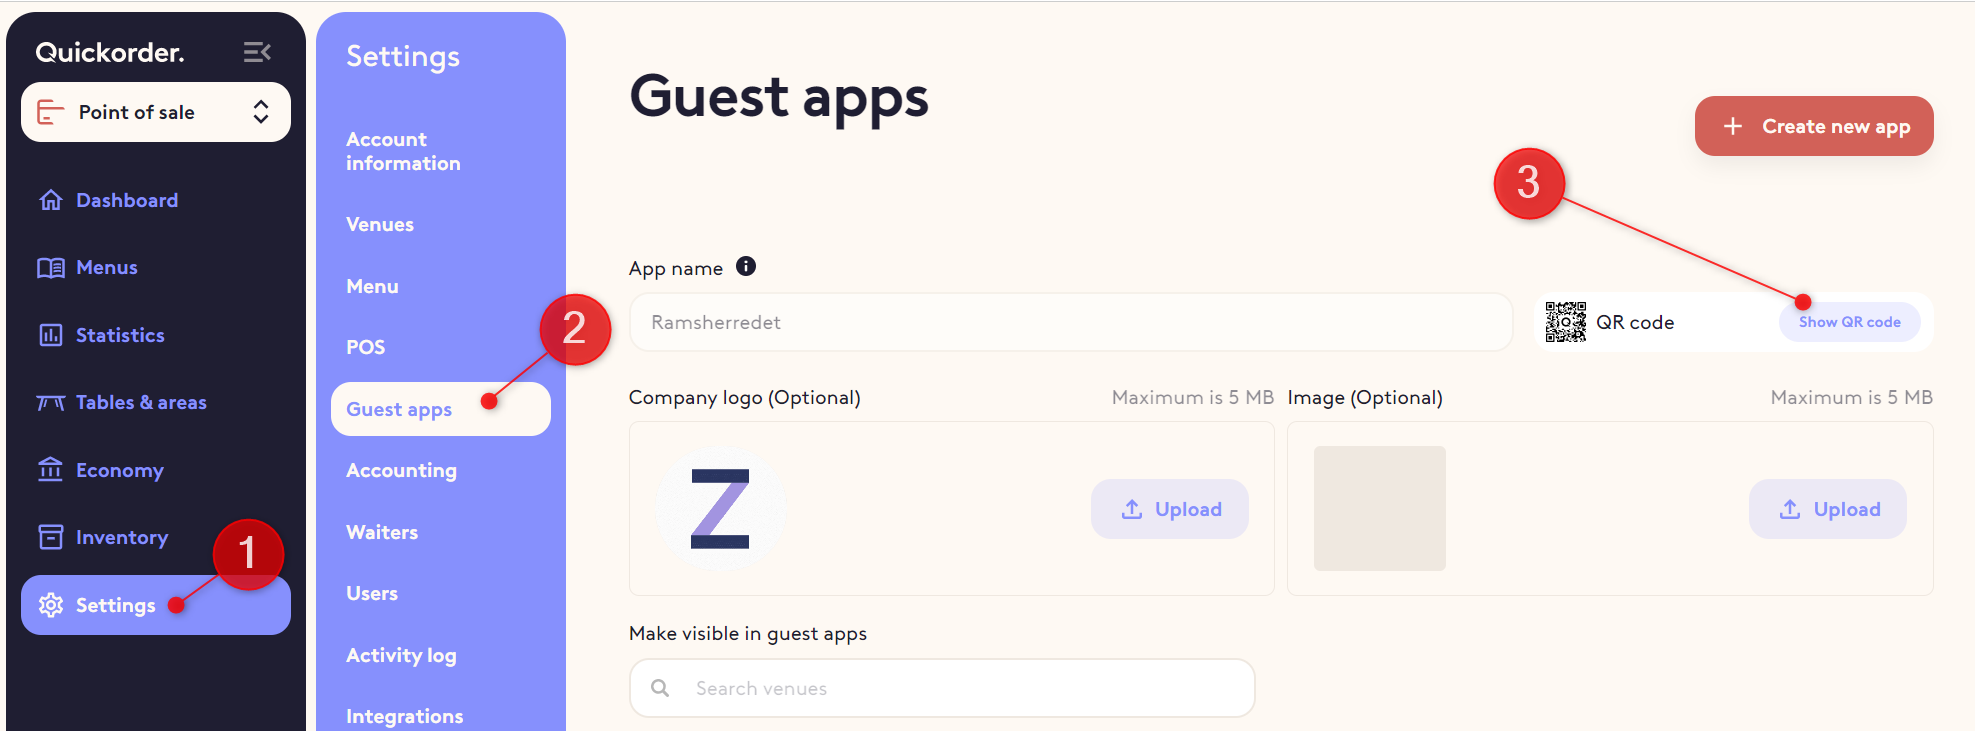
Step 5: Get the QR code for marketingmateriale
Go to Settings - Guest app
- Here you can see and download a unique QR code you can use for marketing materiale like.
- Webpage, flyers, posters etc.
- If you use dine-in then you can have tabletalkers with your QR code to make it easy for the guests to access the guest app
- Please contact us. we have templates and experience with this and we will gladly help you. (Click the Support button
 in the bottom of your menu to see contact information)
Step 6: Check the app to see if everything is correct
Go to Settings - Online ordering app - Preview app
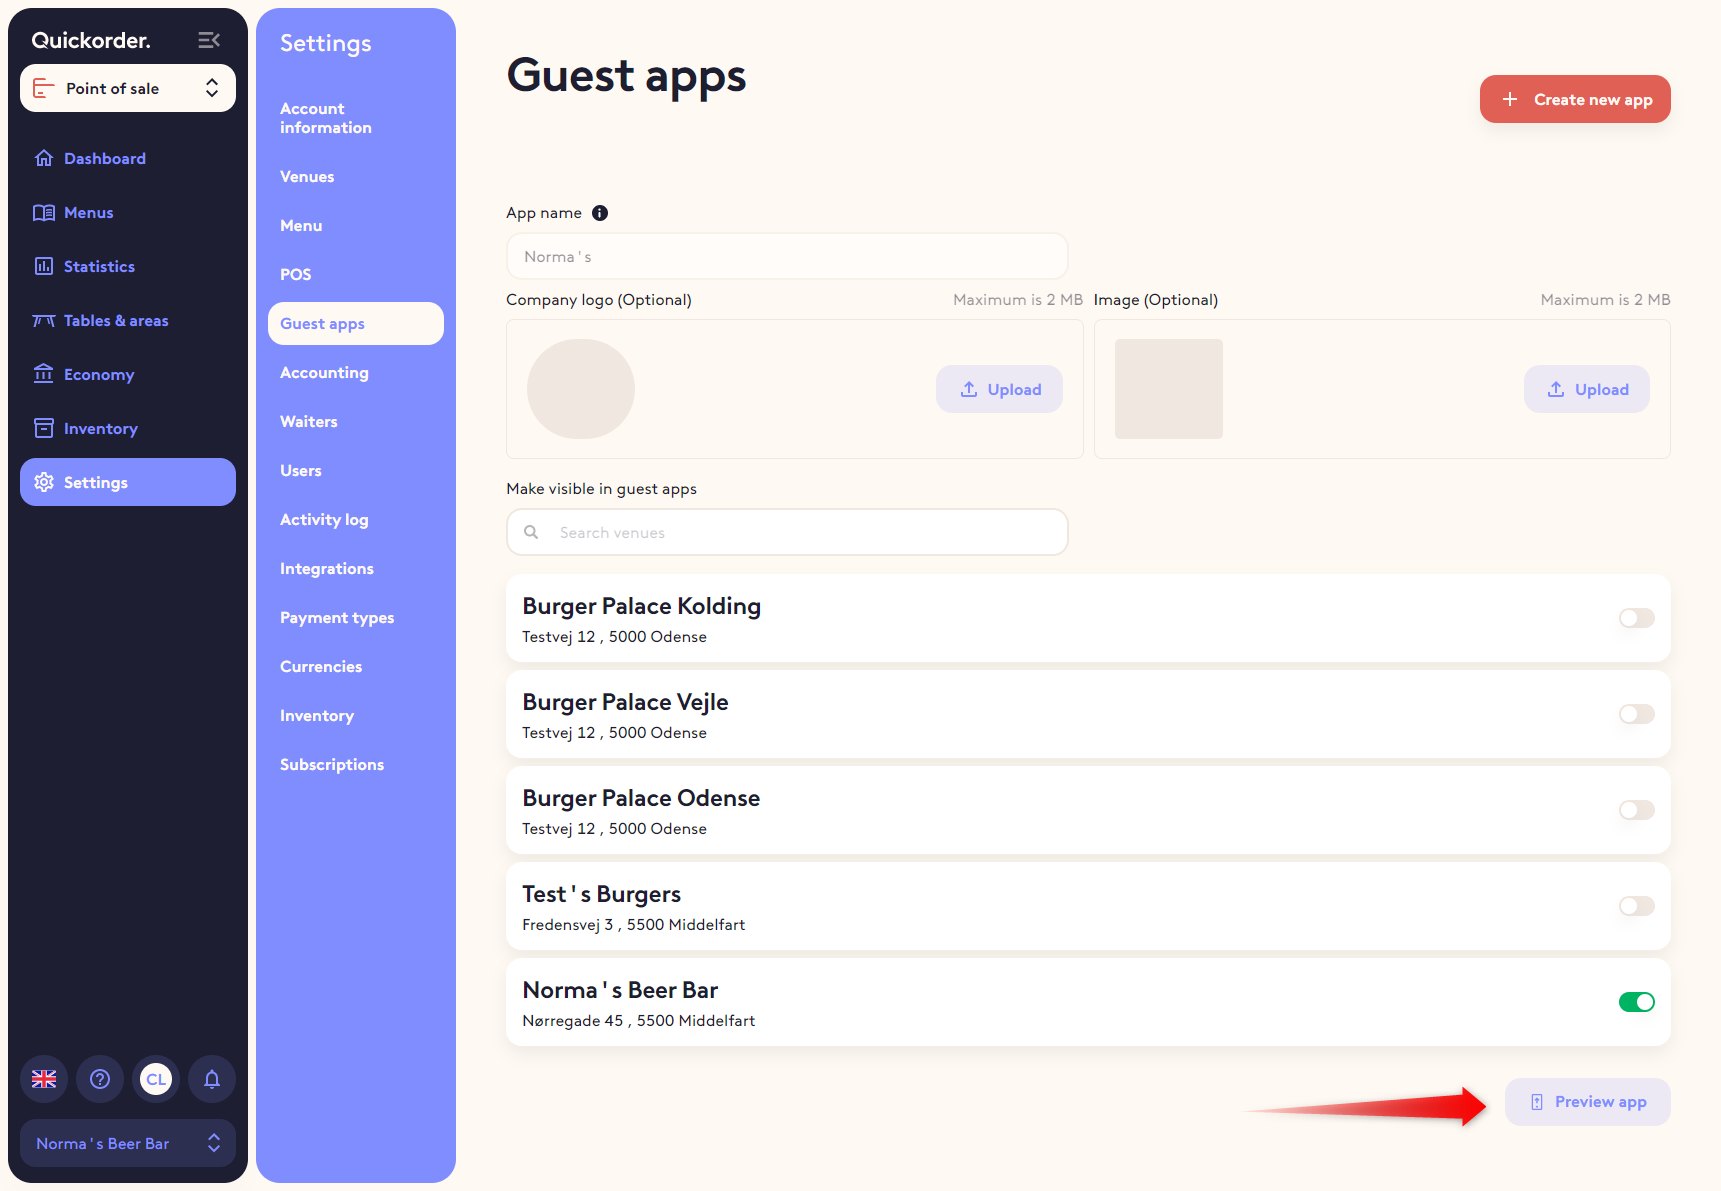
You should see a button called 'Order takeaway (Pickup only)'
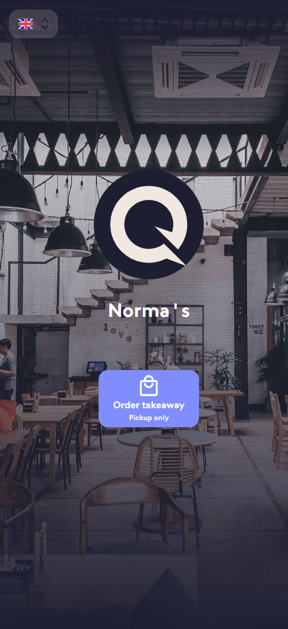
Click the button and browse through the menu(s) to check that everything looks fine.
4. How the guests will use it
Guests can order food from home and pick it up at your restaurant
- The guest will find your takeaway menu link from your website
- They choose order takeaway
- They add the products they want, choose a pick-up time and pay
- They get a confirmation page where they can see their pick-up time, order number (To Go order) and your venue address and phone number
That was it!
Read this article to see how to manage ToGo orders on the POS (iPad)