
This article gives you the information you need to get started with your new POS. Once you have read this article, you are more than welcome to read our other support articles, so you can master your new POS system.
You will primarily be using the following three resources:
- Backoffice (pos.quickorder.io): Here, you can set up your menu and do settings
- Quickorder POS App: Our app is your new POS
- Equipment: The cash register and printer(s) need to be connected to the QuickOrder POS app, whereafter you can select what you want to print
1. Users
It is possible to add more users, so the necessary people can access the backoffice or log in to the Quickorder POS app. This can be relevant if you have several managers in your restaurant, or if you want to give, for example, your accountant direct access.
- Go to pos.quickorder.io and log in
- Select Settings > Users > Create User
- Enter Name, Email, Password and Role
You log in with your email and password
There are two types of roles:- Admin: Admins can add and edit users and admins
- User: A user cannot edit other users than oneself. A user can only log in to the department(s) that an admin has given the user access to, and can therefore only see statistics for that or those department(s)
2. Account Information
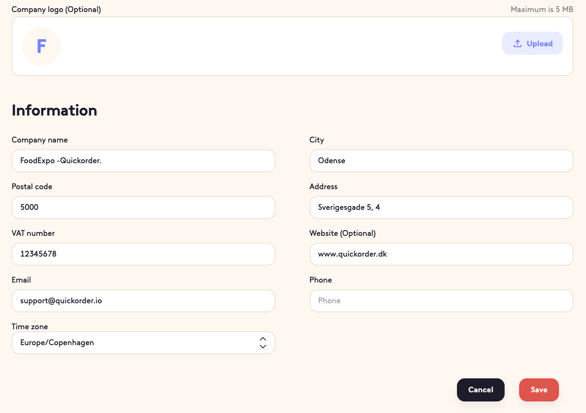
The account information must be added to each department, so if you have more than one department, you must be aware of filling in the information for all of them.
- Open your internet browser and log in to pos.quickorder.io
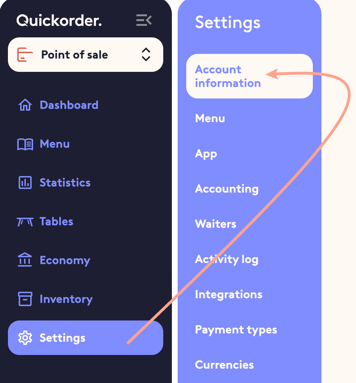
- Go to Settings > Account information
- Here, you can add information and also add a logo (this will be printed on your receipts)
- Click Save
3. Setup
Some things need to be set up in the backoffice before you can receive your first orders. Below, you can find the links to the support articles that you will need:
1. Create Menu
2. Payment Types setup
3. Table Management
Once the above things have been set up, we need to set up the equipment - therefore, proceed to step 4.
4. Equipment
Now is the time to connect the register and printer(s) to the iPad, so kitchen, beverage, and customer receipts are printed exactly as you wish.
Is your equipment brand new? Then you can use the following instructions:
Connect cash register (mPOP)
Connect receipt printer (Cube & TSP, Bluetooth)
Connect receipt printer (LAN)
Has your equipment been used before? No problem! Simply just reset them before connecting to the iPad. See instructions below:
Restore cash register (mPOP)
Restore receipt printer (Cube)
Restore receipt printer (TSP, Bluetooth)
If you do not have your hardware yet, then go to the following guide: Compatible Hardware for QuickOrder
5. Training mode
We are introducing you to training mode at this moment, because you probably have a lot of things that you would like to test before serving your first guests. With training mode, you can test these things without affecting your reports, however, it will be visible in your statistics. You can also use training mode later if, for example, you need to train a new employee.
Activate training mode:
- Open the Quickorder POS app and log in
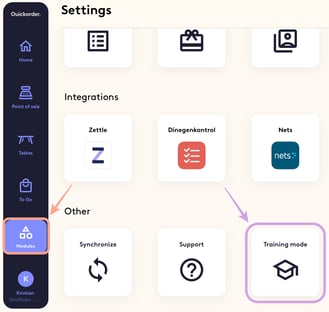
- Go to Modules > Training mode > Activate training

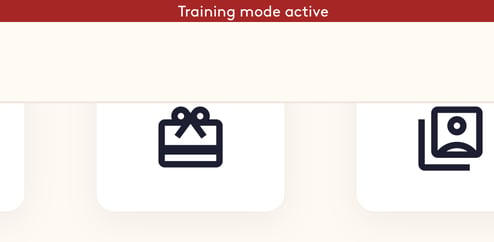
- You will now see a red beam at the top of your screen saying "Training mode active"
Deactivate training mode:
- Go to Modules > Training Mode > Deactivate training
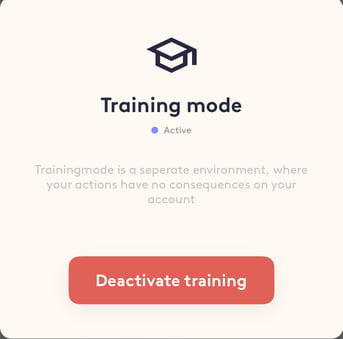
- The red beam at the top is no longer visible
6. iPad - The Quickorder POS App
The Quickorder POS app will, hopefully, become your new best friend. You can read more about why Quickorder can become your new best friend right now here
First of all, we recommend that you go through the following steps:
- Get an overview of the app
- Try making some orders in training mode
Below we link to the articles that are most relevant here in your start-up:
Cash counting: When the day starts you open the cash register, when you close up shop it must be closed.
IMPORTANT:
- Always make sure that youre ipad's are in the POS app when during service
- If you use online takeaway then your ipad should also be online on the POS app outside service, so you are able to receive takeaway orders
- Dont use your ipad for other things, this can interfere with the performance and stability of your POS
- Use an individual network for your POS connection
- If you use a shared wifi for your POS, this will interfere with the stability and performance
TIP: Did you know that there is a shortcut to all your favorite features? At the far left of your iPad, you swipe from left to right, after which Shortcuts will appear.
If you press Edit, you can select which functions you want in your shortcuts. Press Done and you will now have your most used functions at your fingertip.
Last but not least, remember that you are never alone - we are never more than a phone call or an email away. Our customer service is open every weekday from 9-16 - Do you have technical issues? Then you can call us 24/7 all days of the year ☎