Overview
1. Create Menu
2. Create Category
3. Create Subcategory
4. Create Product
5. Add Ingredients to an Item
6. Add Variations to an Item
7. Create Category Divisions (Optional)
1. Create Menu
You can only have one active menu at a time, but you can create more than one menu. For example, if you have both a winter and a summer menu, you can create them as two separate menus, but you can only set one of them as being active.
- Log in to your backoffice via pos.quickorder.io
- Go to Menu > Create menu

- Select the name of your menu card, insert a logo (optional)
- Click on Create menu

- Mark the POS icon to make this (Main) menu visible on the POS. Only one menu is shown on the POS.
2. Create Category
Create your categories, it can for example be Starters, Main courses, Desserts, Drinks etc.
- Click on your menu and then press Create category
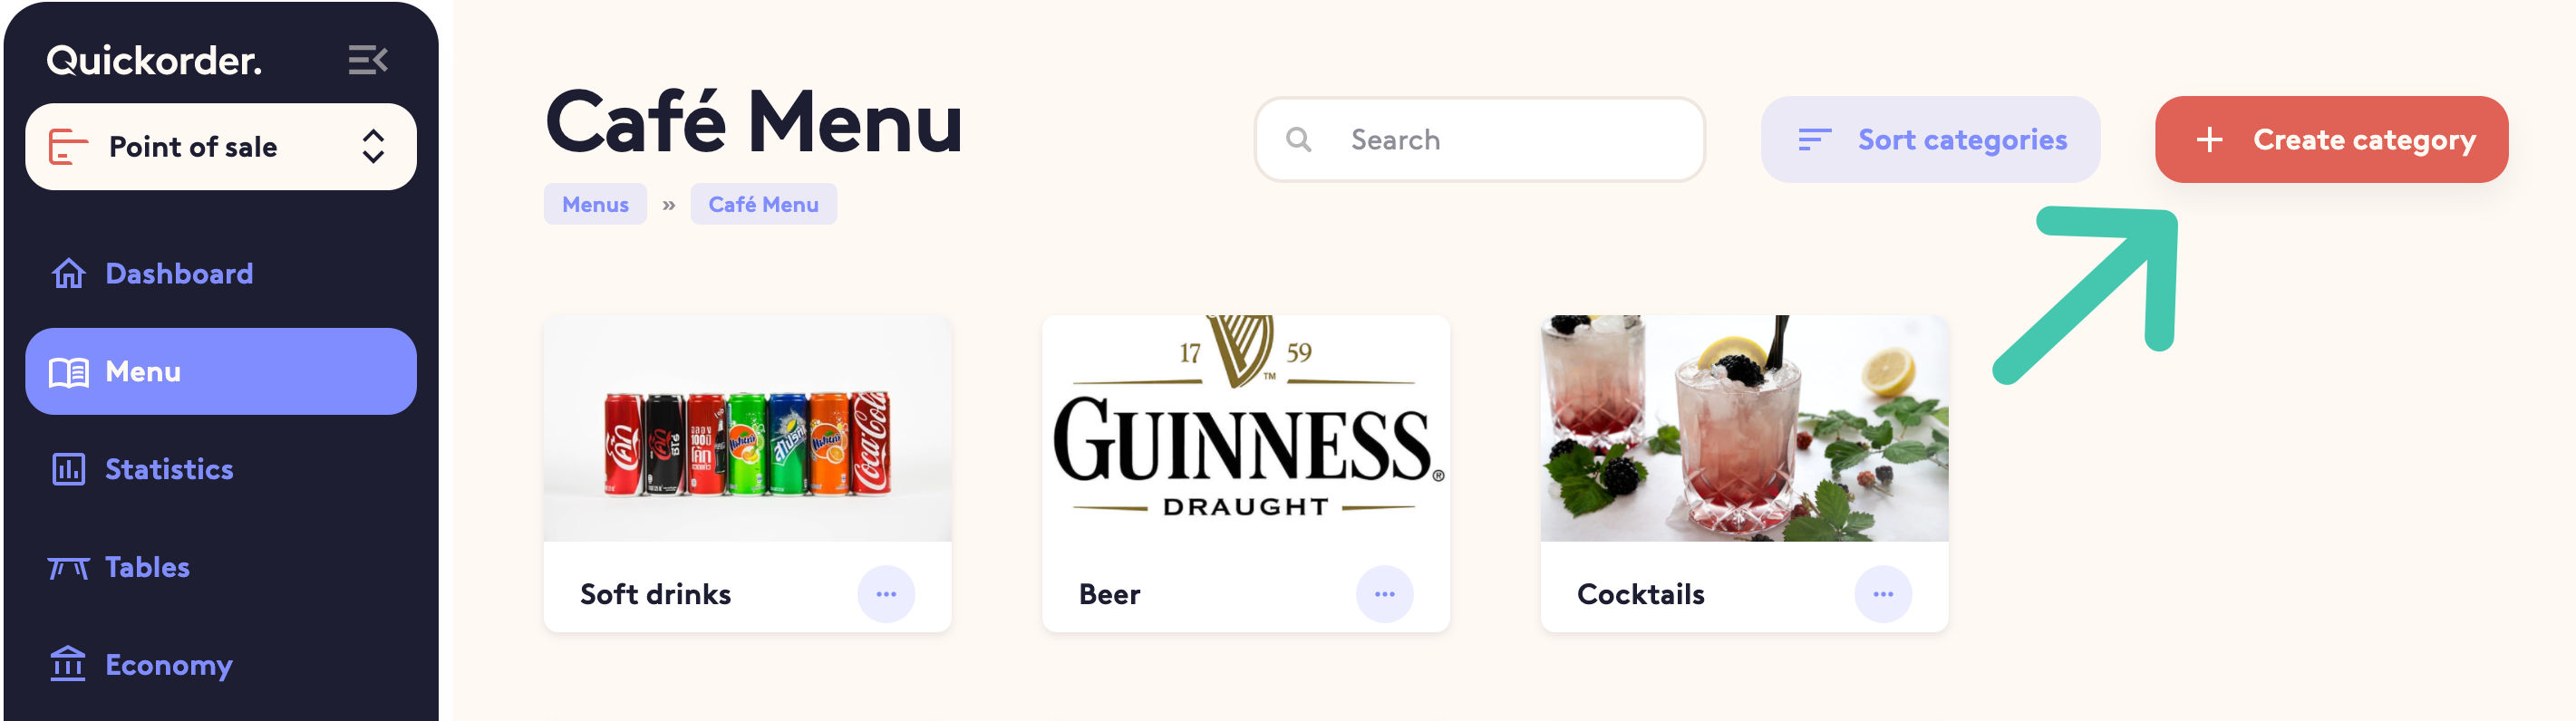
- Give the category a name and upload an image (optional)
- Click Create category
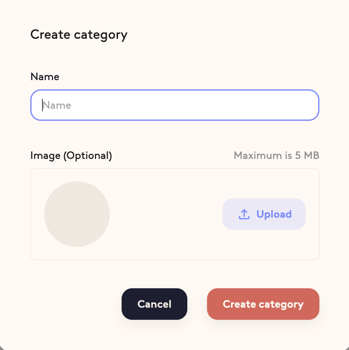
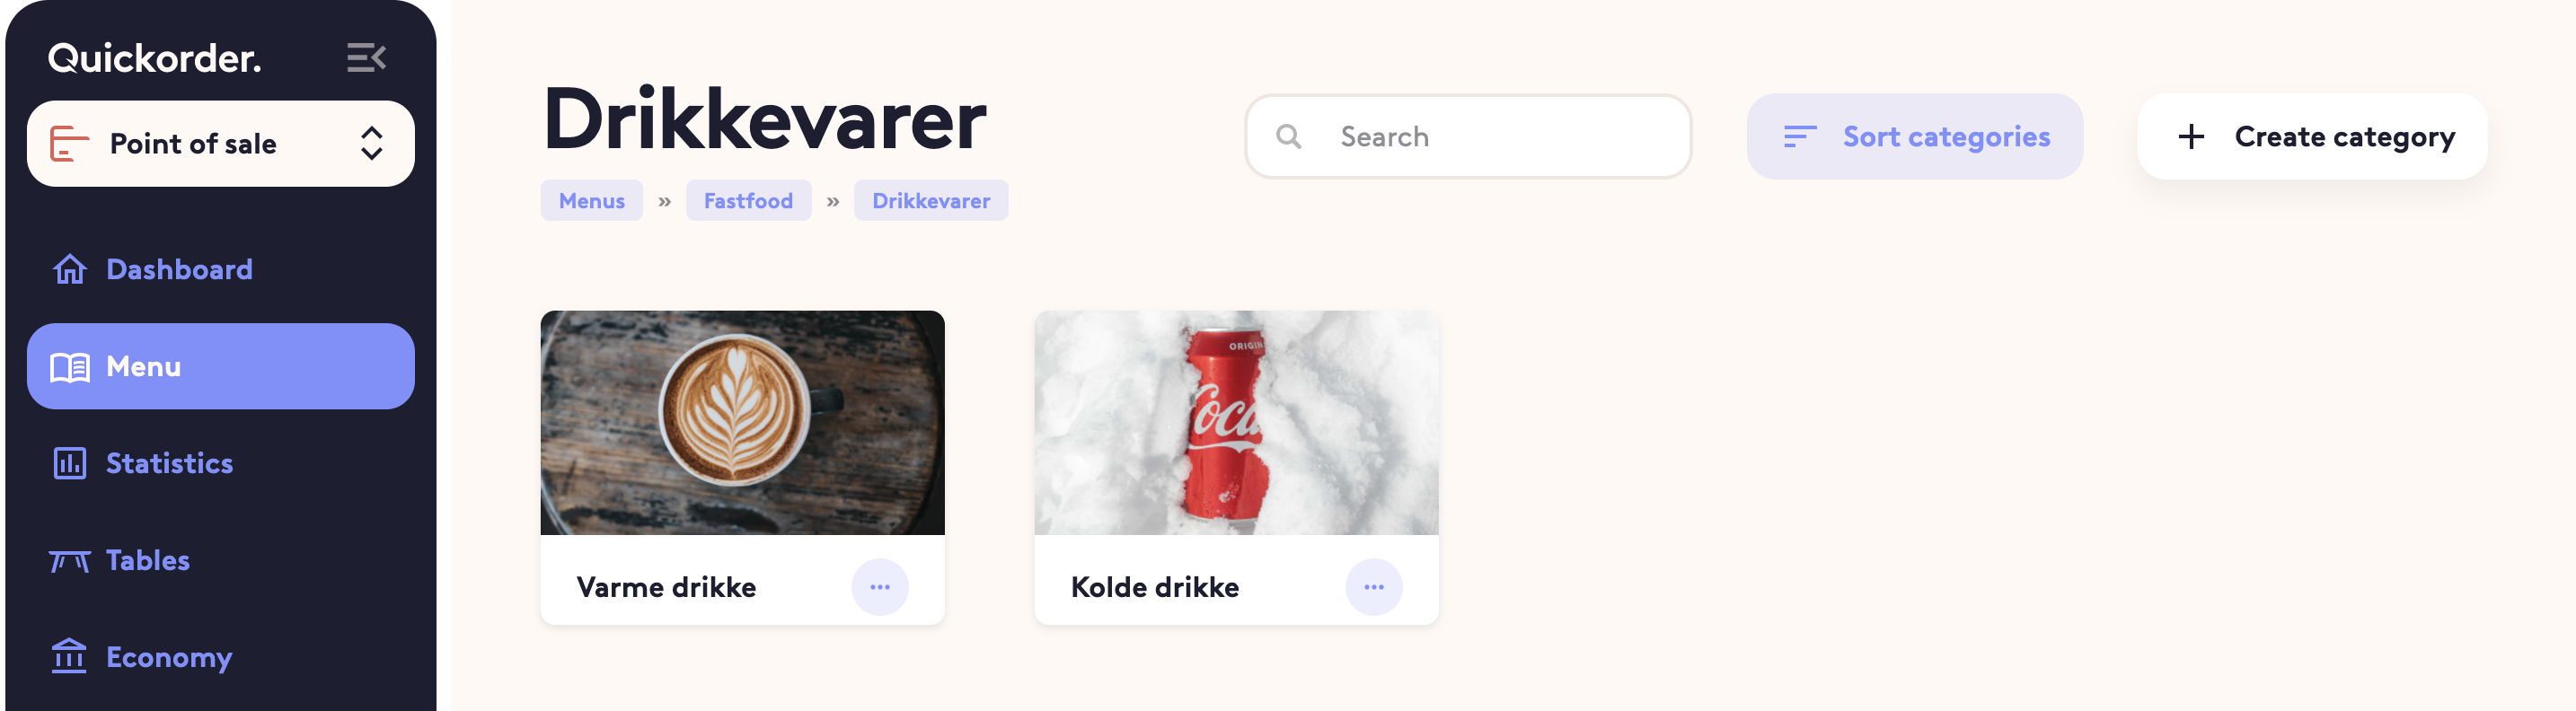
3. Create Subcategory
You can optionally create subcategories for your categories. For example, under Beverages you can create subcategories such as Soda, Beer, Wine. This gives you a better overview if your menu is large.
- Click on the category in which you wish to create subcategories and click Create category
- Give the category a name and upload an image (optional)
- Tap Create category
4. Create Product
You have now divided your menu into categories and maybe even subcategories, so now is the time to create your products.
- When you are in the desired category or subcategory, click Create product
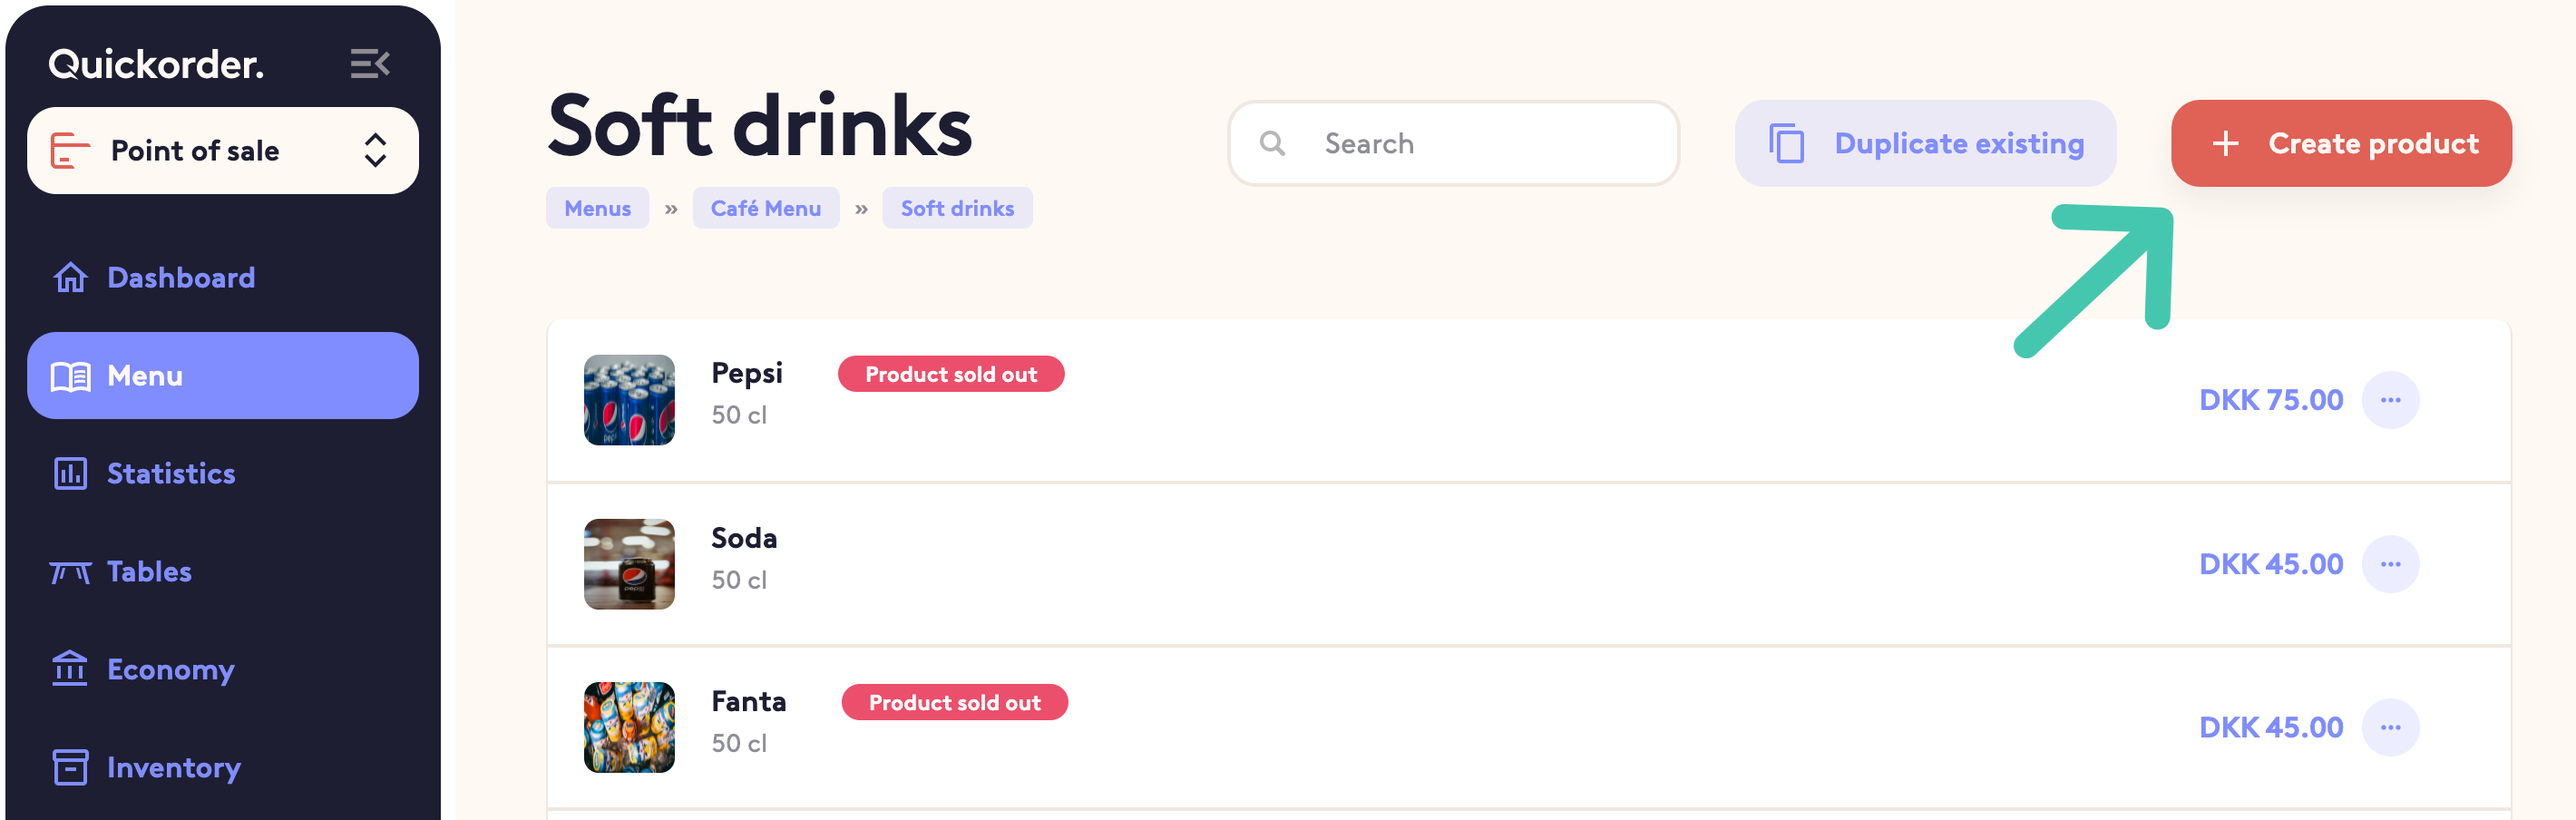
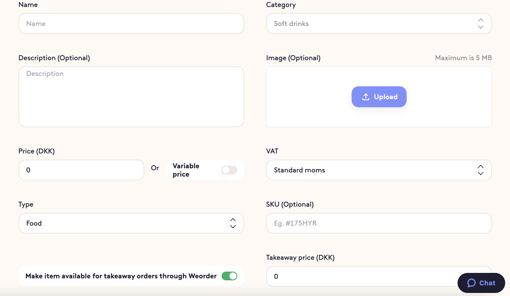
- Fill in the information for the product such as Name, Description, Price and Type
- Please note that it is important to choose the correct Type because this is - among other things - one of the ways to differentiate what you want your printers to print out
- If the product has a different price, if you order it as take-away, then you can enter this price under Takeaway price
- If you also want to fill in Variations and Ingredients for your product, then move on to step 5 and 6. If it is not necessary to add this for your product, then you can simply click Create in the bottom right corner
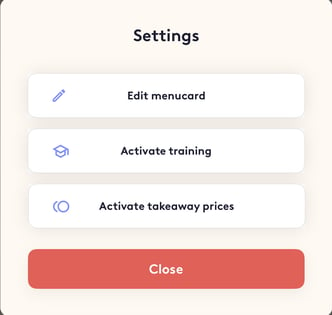
TIP: Do you need to sell an item at the take-away rate from your POS? Then just tap the three dots in the top right corner of the POS module on the iPad, then click Settings > Activate takeaway prices. Remember to deactivate take-away prices again.
5. Add Ingredients to an Item
Ingredients allow you to customize your items to the guest's needs. You can, for example, deselect certain ingredients (for example for allergies), or add ingredients to the item. This feature also allows a customer to add cheese, for example, but deselect tomato when buying a burger.
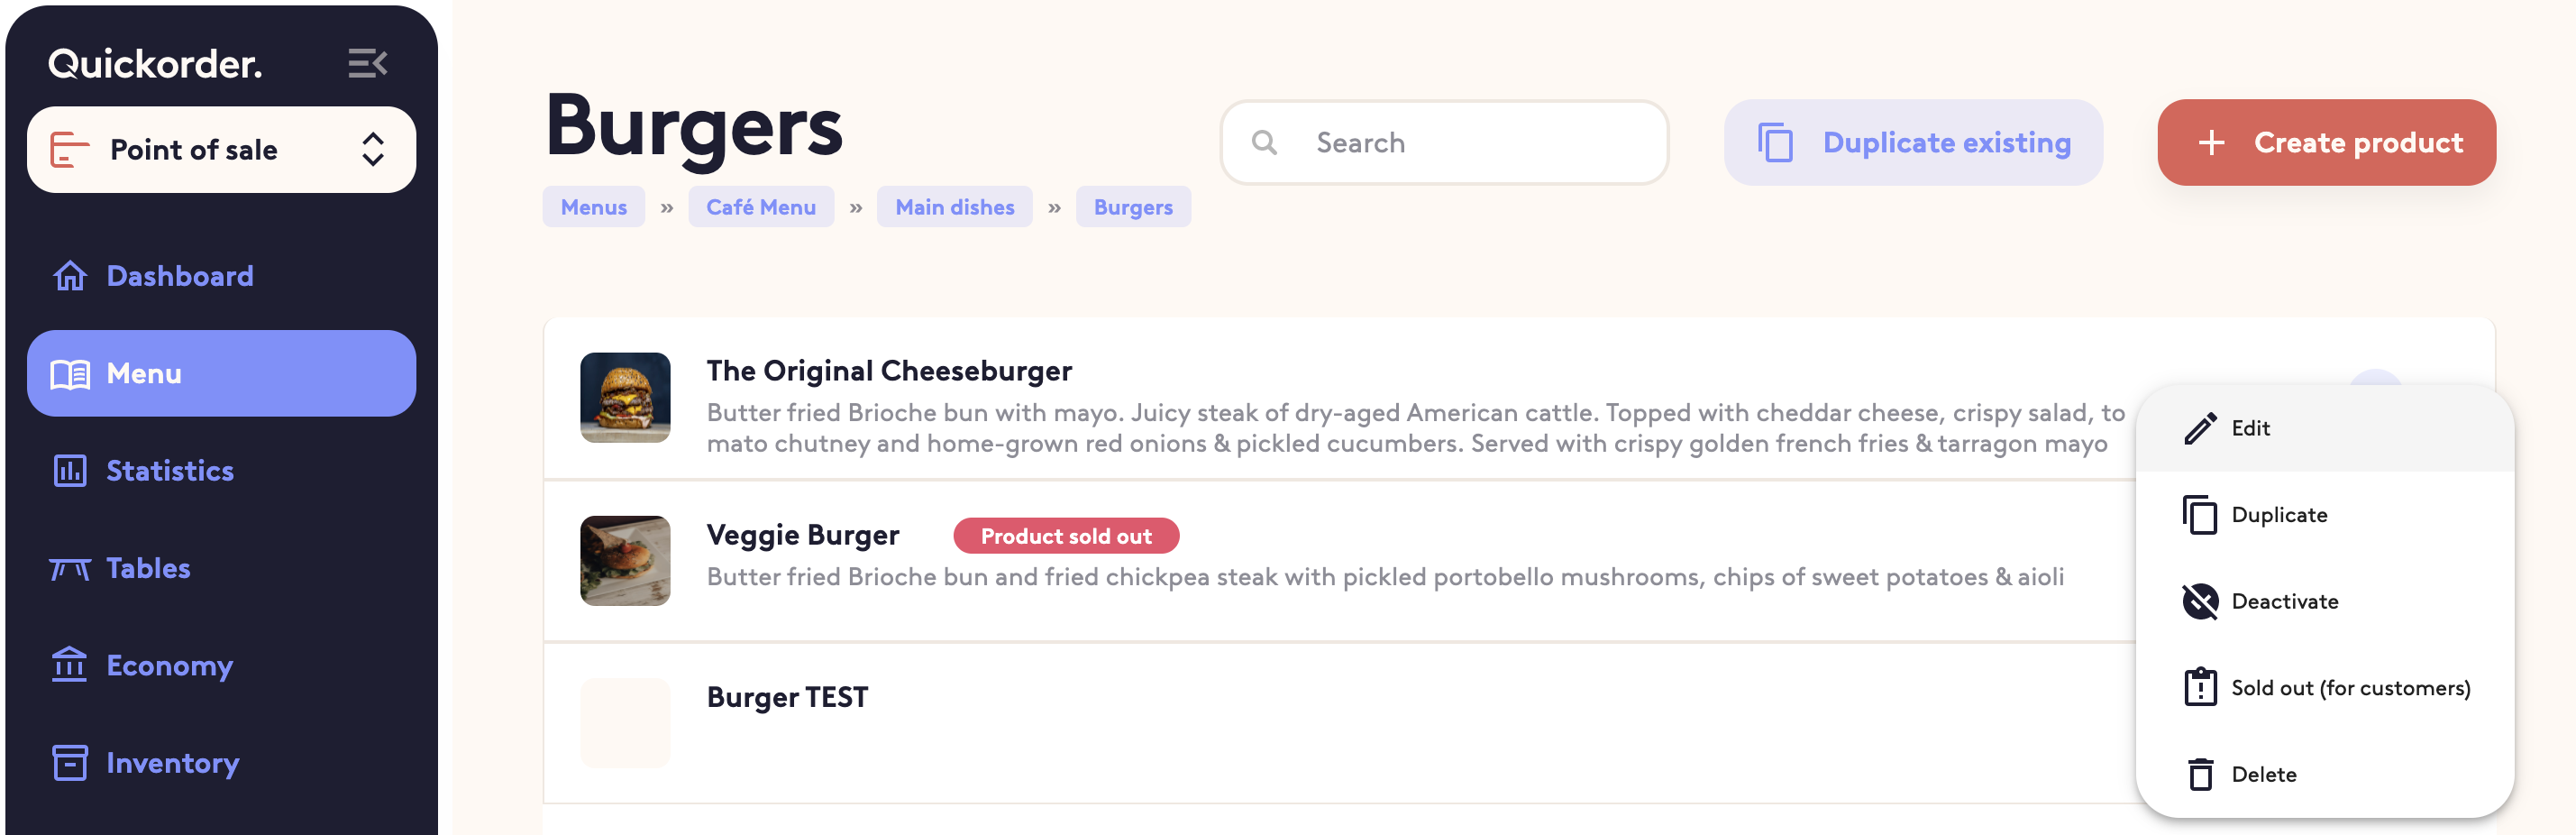
- If you are not already on the product, then go to Menu and find the item for which you want to create ingredients
- Click on the three horizontal dots next to the item and select Edit
- Scroll down until you reach the following image:
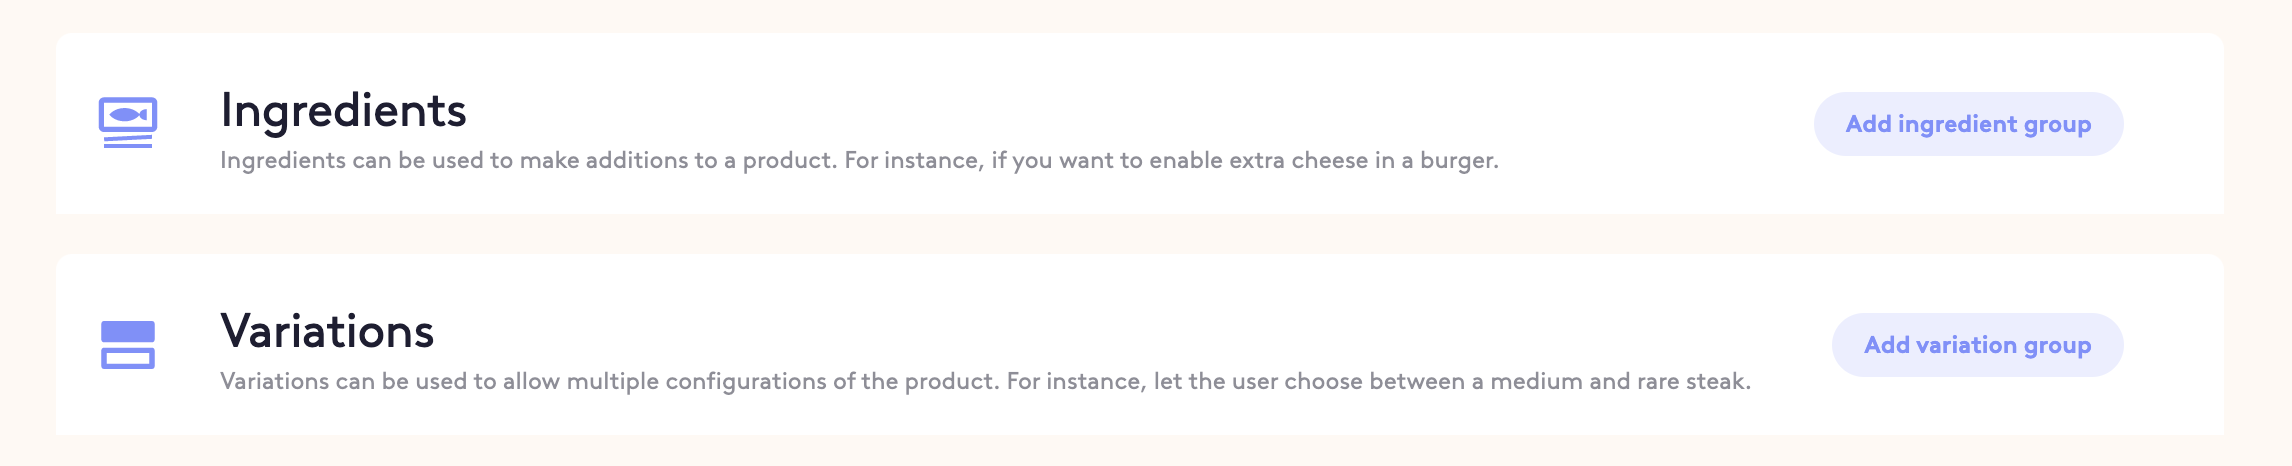
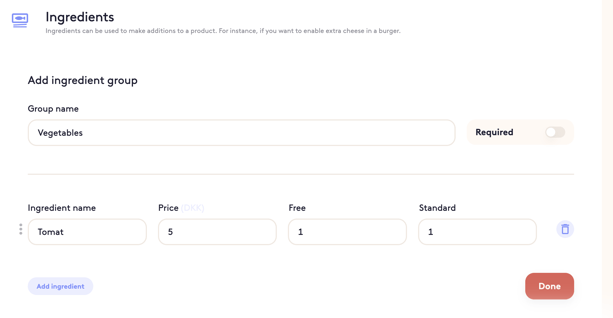
- Click on Add ingredient group, whereafter the following image will appear
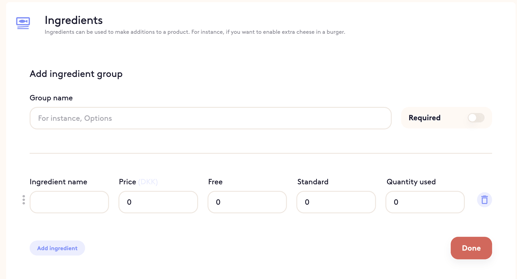
- Fill in the information
- Group name: Enter the name of the ingredient group (for example "Vegetables")
- Required: If this is activated, the options will always appear when ordering the item through Quickorder POS. If it is not required, then you will have to press the item in the basket to bring up the options
- Ingredient name: Give the ingredient a name (for example "Tomatoes")
- Price: If it does not cost anything, then simply leave it as "0", however, if the customer needs to pay extra to add the ingredient, then enter the price pr. item
- Free: If a number of this ingredient is included in the item price, you can enter it here. If you put it as "2", then the ingredient price will first be added if the guest adds more than two
- Standard quantity: Enter the amount of that ingredient which is included in the product as standard
- Delete ingredient: If you want to remove an ingredient, you can just click on the "trash can"
- Add ingredient: If you click here, a new line will appear where you can add another ingredient
- Click Done
- If you have several ingredient groups, you can easily add more by pressing Add, and then you just need to follow the above procedure again
TIP: If you have QR-codes on the table or our take-away system, then you can use this feature to upsell by adding an ingredient group called e.g. "Add Beverage". By adding some of your beverage options, and making the ingredient group required, then the guest will be asked when ordering a product, if they want to add something to drink 🙌
6. Add Variations to an Item
Variations are required options that must always be selected when ordering an item. For instance, the size of a soda (small, medium or large) or how the steak should be cooked (rare, medium).
If you select one of the variations by default, then you will have to actively press the product in the basket to change to another variation. If, on the other hand, you do not select anything by default, then a window will automatically appear when you select the product, where you must decide which variation you want.
- Click Add variation group
- Press Add whereafter the following image will appear
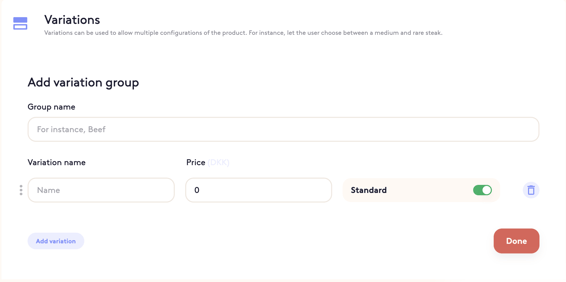
- Fill in the information
- Group name: Give the variation group a name, e.g. "Size"
- Name: Give the variation a name, e.g. "Small"
- Price: Enter the price of the variation (this price is added to the price of the item when ordering)
- Standard: Select whether the variation is the standard (you can only select one variation as standard for each variation group)
- Delete variation: If you want to remove a variation, you can click on the trash can
- Add variation: If you click here, a new line will appear where you can enter a new variation
- Click Done
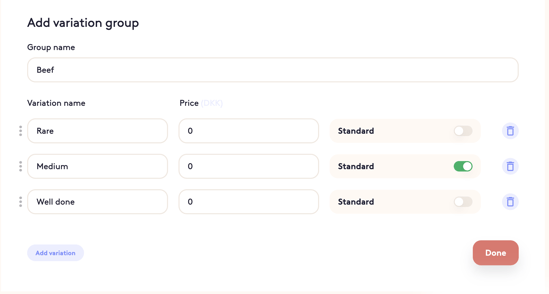
TIP: If you click on the three vertical dots to the left of the ingredient name, then you can change the order of the variations by dragging the dots up or down.
In the Quickorder POS app it will look like this:

7. Create Category Divisions (Optional)
Category divisions are used to divide your categories into general groups. These groups will be displayed on your kitchen receipts so the chef can see them. For example, you may want to divide your categories under the categories of starters, main courses and desserts.
- Click on Settings in the navigation on the left
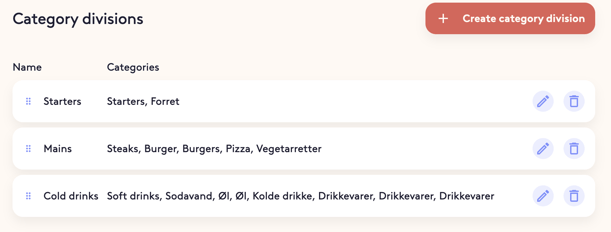
- Choose Menu and then Category divisions
- Click Create category division
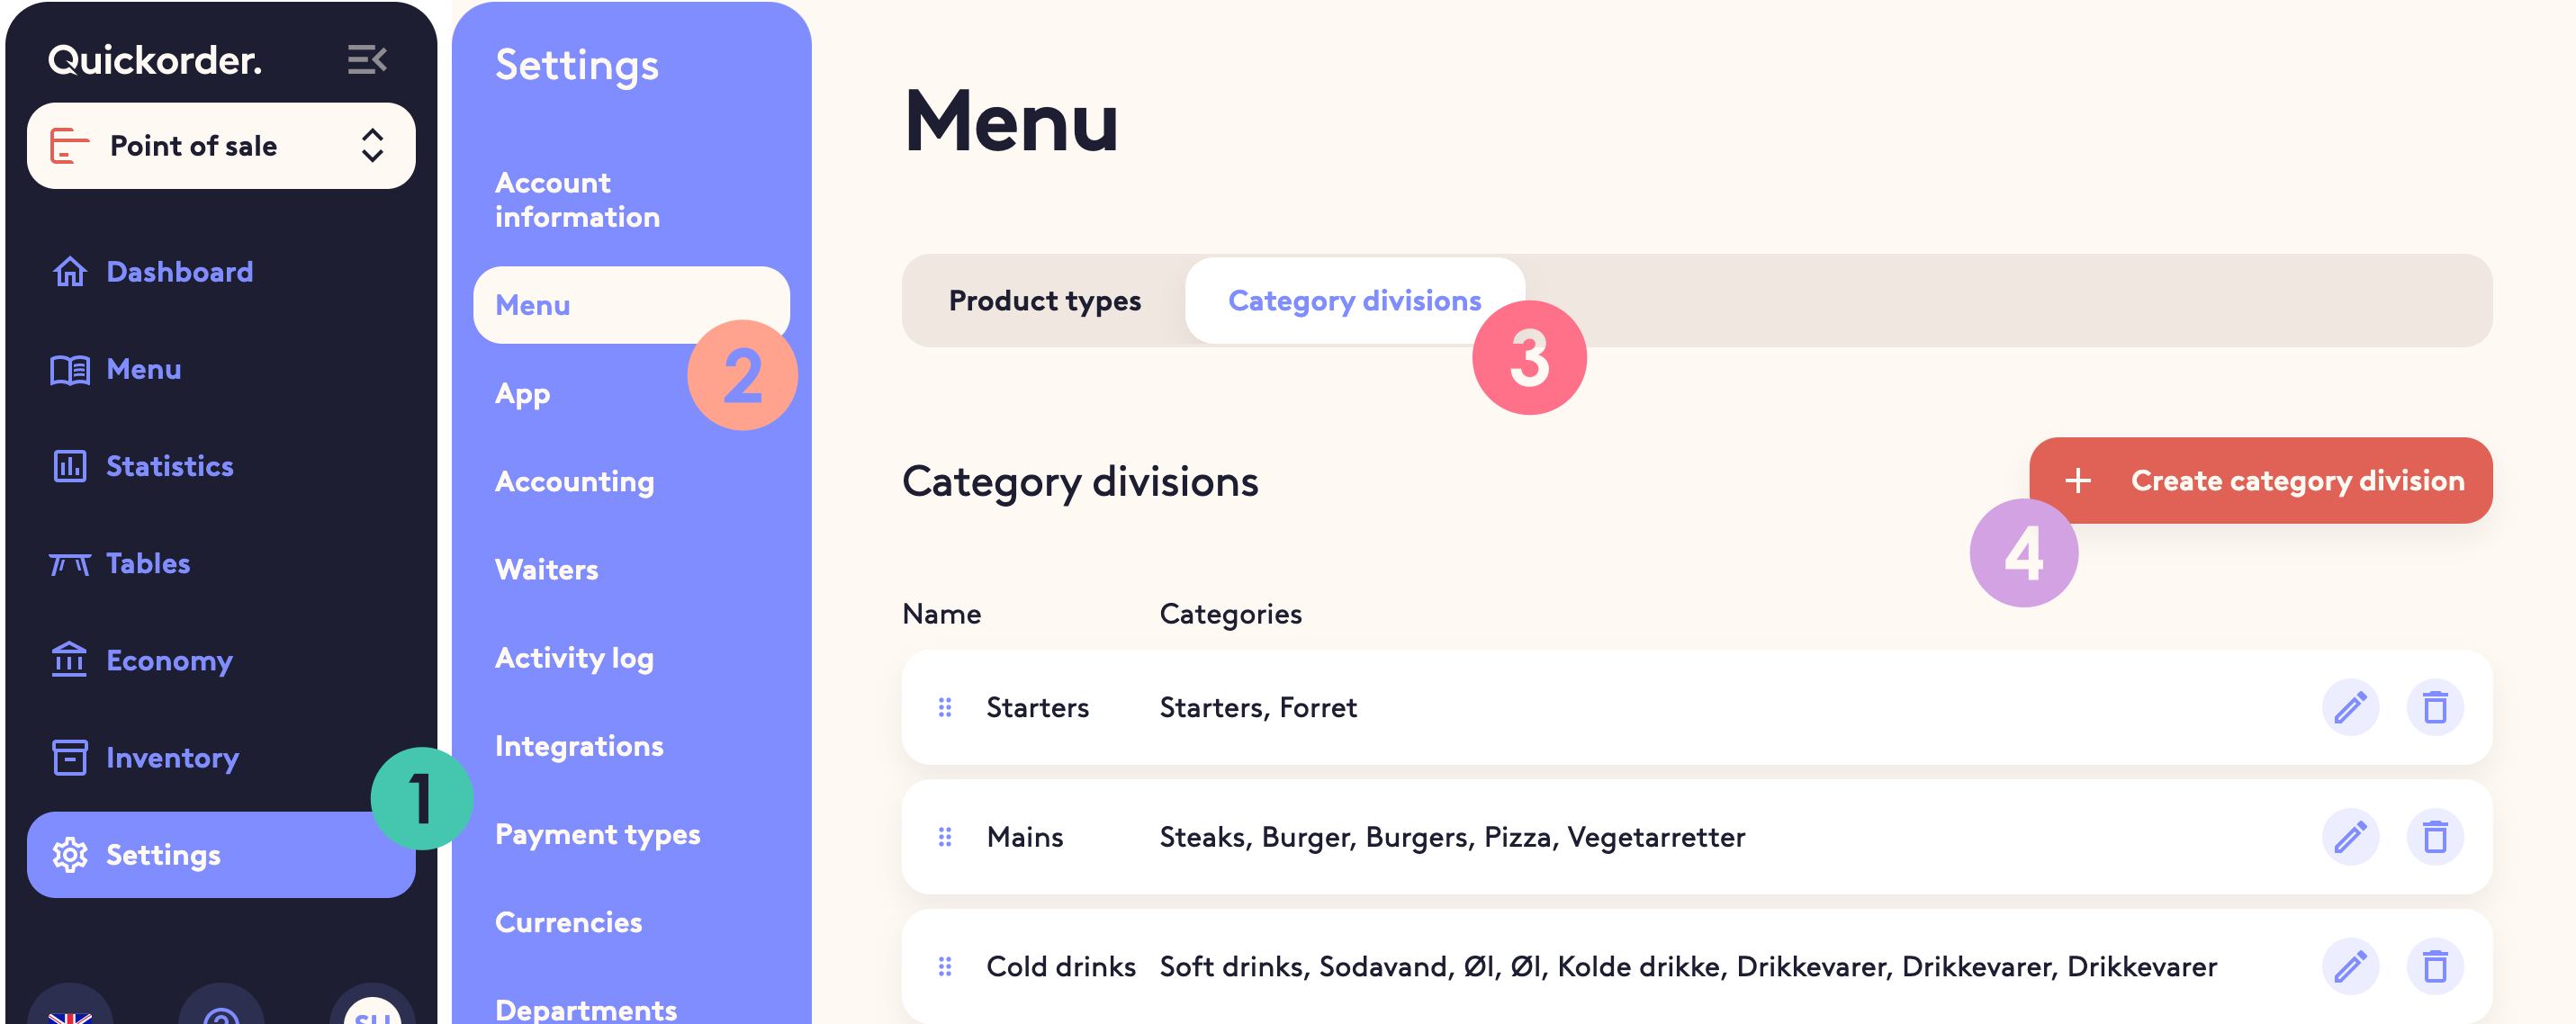
- You can now create the different category divisions. An example might be "Starters" - once you have named the category, then select the categories which should be included in this division. The categories you can choose from are the ones in your menu
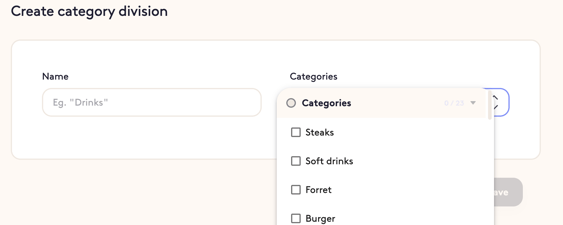
- Click Save each time you create a new category division
- Once you have created all your category divisions, you can make the order of how it should be on the kitchen receipt by dragging the three vertical dots
Congratulations! You now have the knowledge to create your perfect menu! 🤩