Table of contents
1. Setup
1.1 Create area
1.2 Create tables
1.3. Create 2D Overview (Optional)
2. Overview in the Quickorder POS App
3. Order Management in the Tables Module
3.1. Add Items on a Table
1. Setup
First and foremost, we need to set up your tables. You do this from your back office.
1.1. Create area
- Go to pos.quickorder.io and log in
- Click Tables > Create area
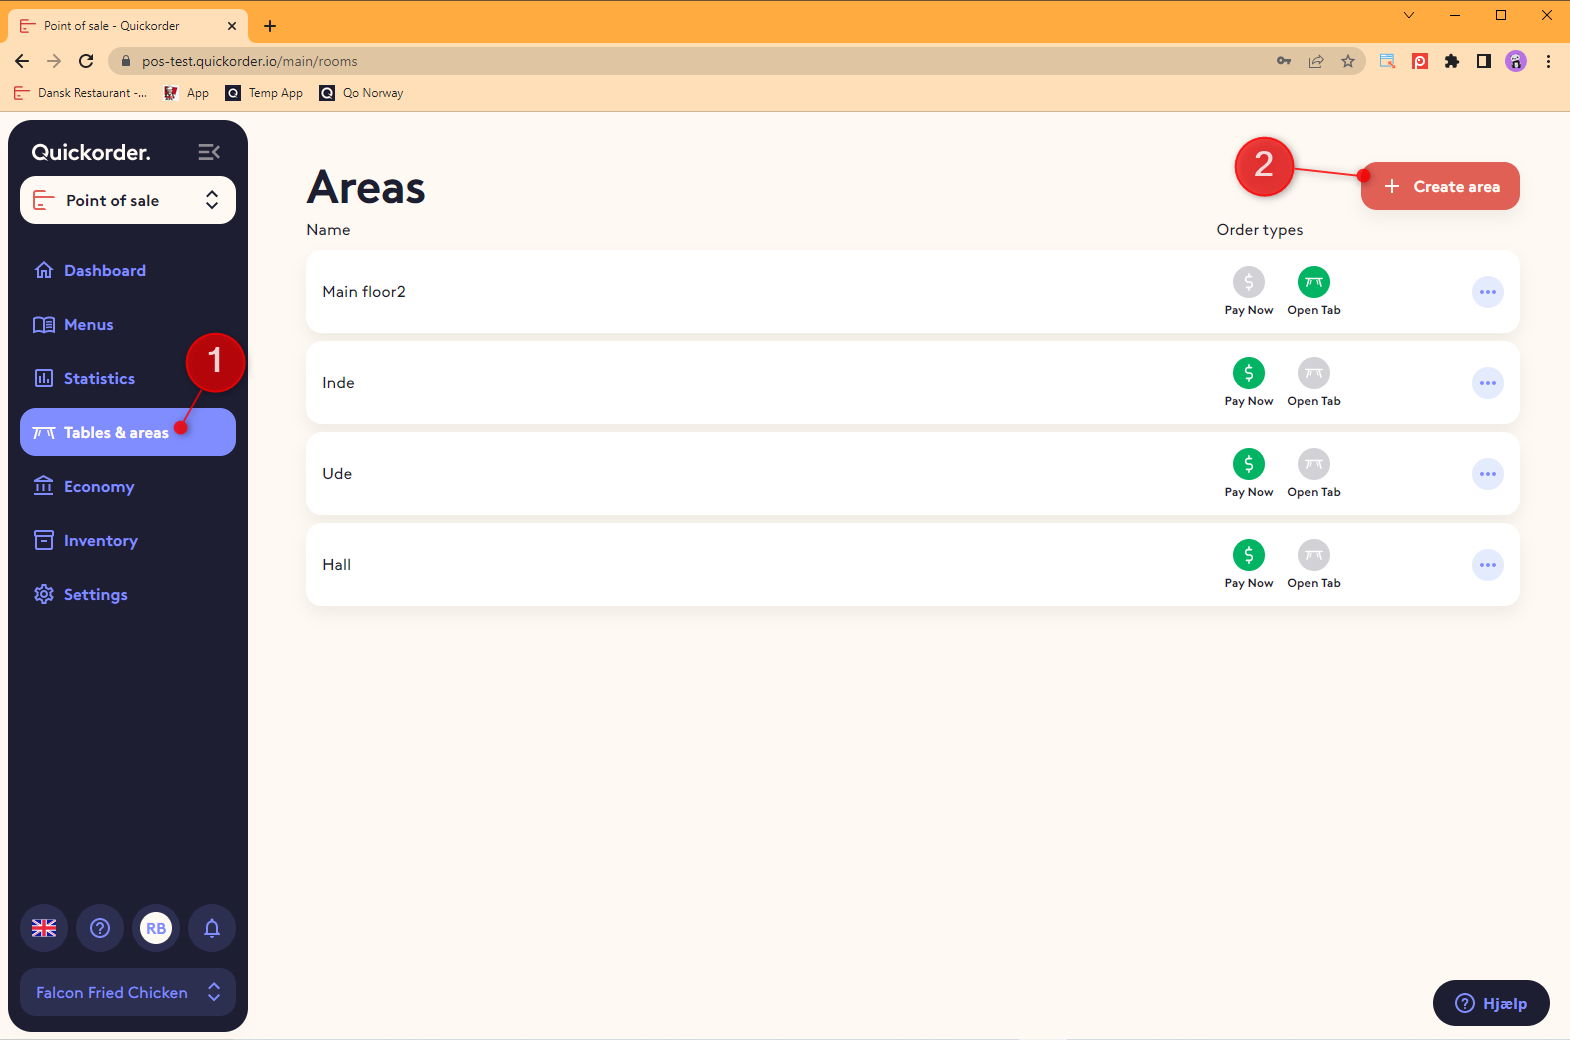
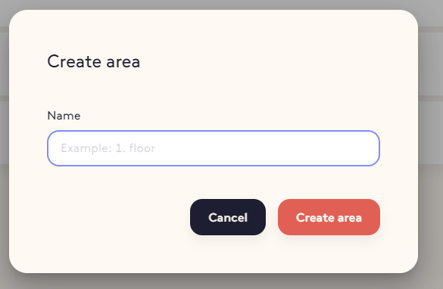
- Name the area and click Create area
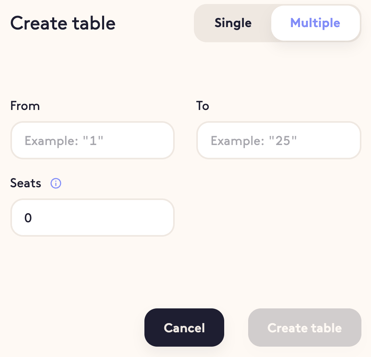
1.2. Create Tables
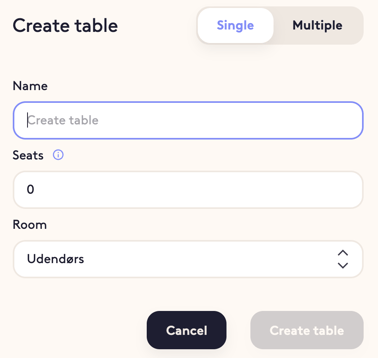
- Select an area and click Create table
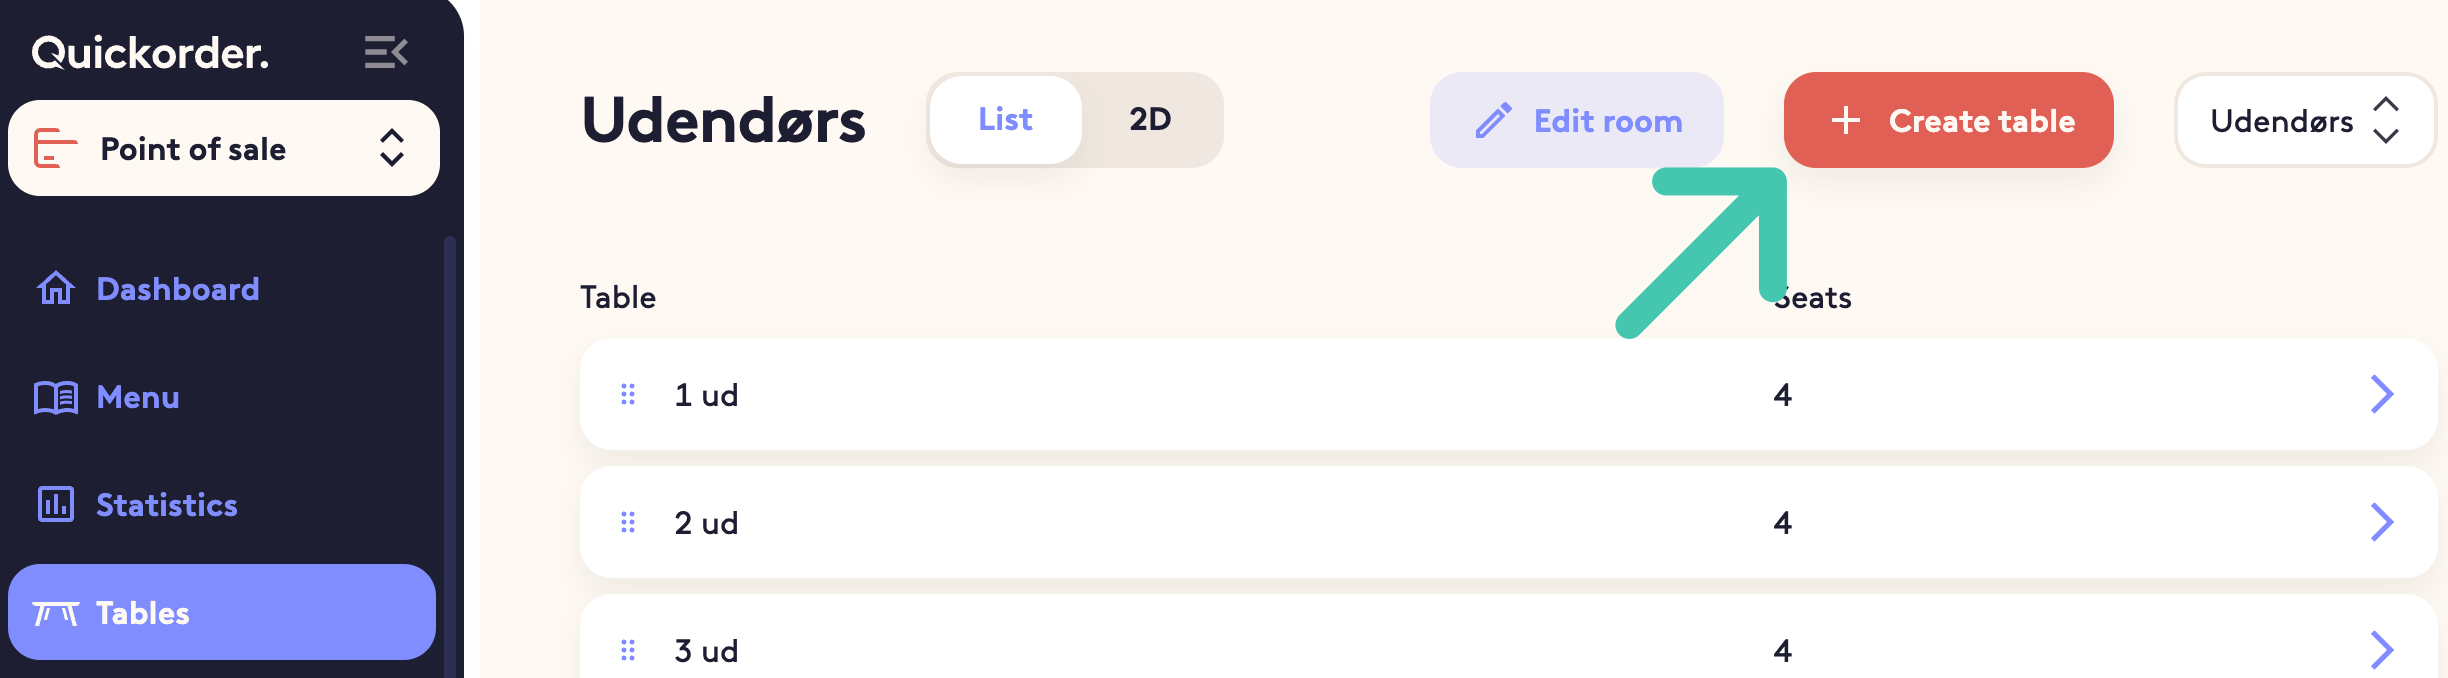
- Give the table a name and select the number of seats
- Click Create table
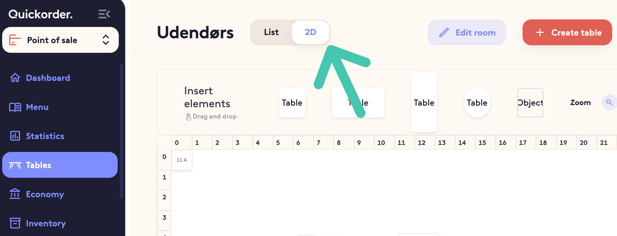
1.3. Create 2D Overview (Optional)
- Switch from List to 2D
- You will now be able to see all your tables in the top left corner. Here, you can pull them out on the canvas and thereby make a 2D overview
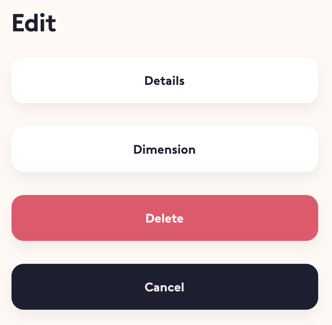
- By clicking on a table, you will receive the options in the picture below. If you select Dimension, you can edit the appearance of the table
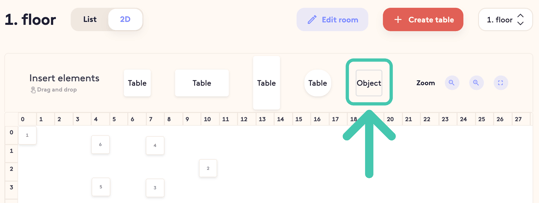
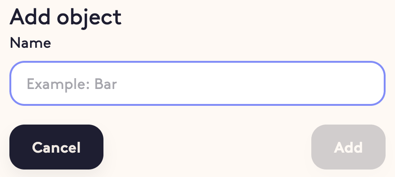
- TIP: Add objects to get a better overview. You can add a bar, an entrance hall, a buffet, etc. You will find Object under Add items. By dragging the Object to the canvas, you can give the object a name. The more detailed your setup is, the easier it will be for your waiters to find a table.
Here is an example of a setup where we have also changed the size of the tables so they depict the number of guests who can sit at each table: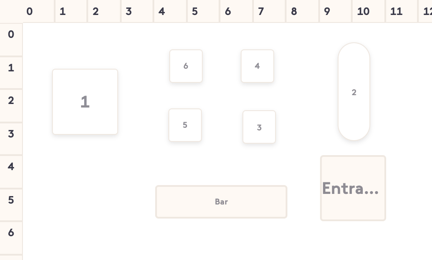
2. Overview in the Quickorder POS App
Once you have set up your tables in the back office, you can enjoy the brilliant overview you now have of your restaurant in the Quickorder POS app.
- Open the Quickorder POS app
- Go to Tables
(2) Here, you can switch between your areas
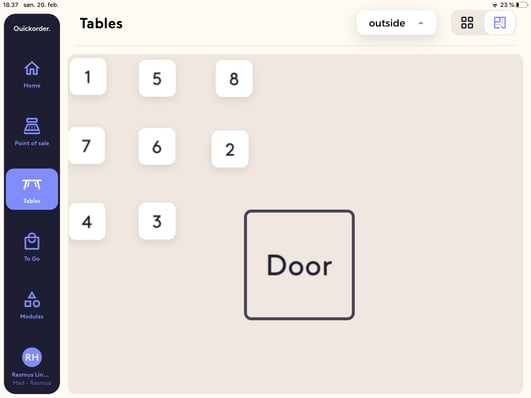
(3) You will see your tables as a list view by default, but at the top right corner, you can change to a 2D overview if you prefer this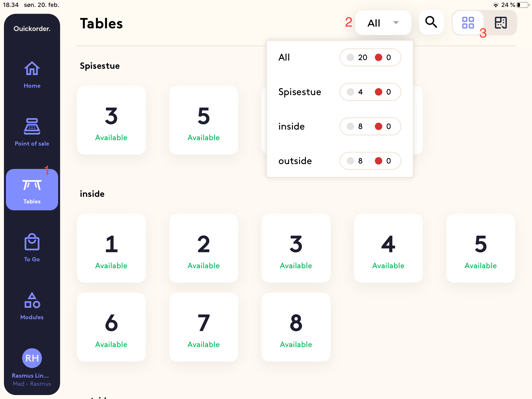
- TIP: Have you noticed that the tables change colour? This is an indication of how long it has been since the last activity on the table. The darker the colour, the longer it's been since the last activity. If you switch to the list view, the time elapsed since the last activity on the table is also specified. In that way, your waiters will have a better idea of which guests might need a little attention.
3. Order Management in the Tables Module
Below we will show you how to create orders directly from the tables module.
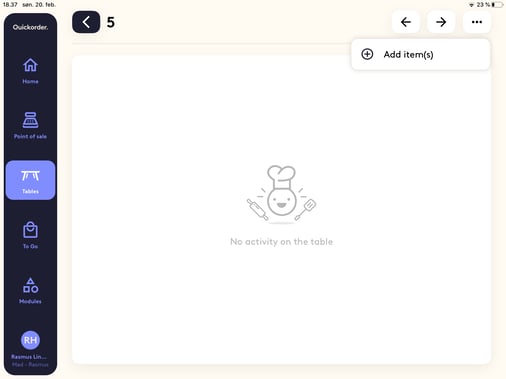
3.1. Add Items on a Table
- Click on a table
- Add items by clicking on the three horizontal dots in the top right-hand corner
- Click Add item(s)
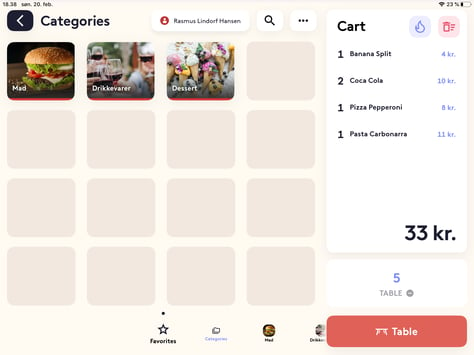
- You will now be redirected to the POS module so you can add the items to the basket that the guest wants to order
- Click on Table, whereafter the order will be created
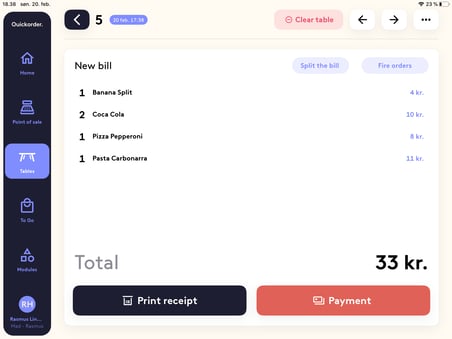
3.2. Edit Items on a Table
- Click on a table where there is an existing order
- You now have the following functions:
-
- Print receipt
- Payment
- Clear table
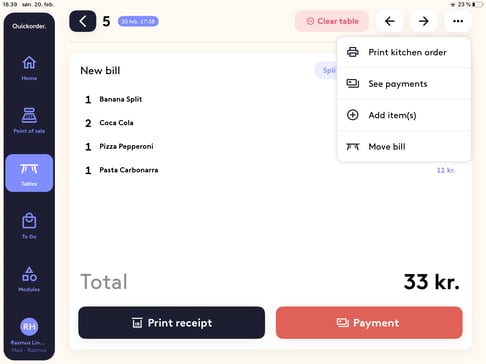
If you click on the three horizontal dots in the top right-hand corner, you get the following additional functions:
- Print kitchen order
- See payments
- Add item(s)
- Move bill
Congrats! You can now create tables and use the table overview in the Quickorder POS app! 🤩