Table of Contents
1. Ordering terminals and redemption agreement
3. Integration
3.2 Connect your Nets Cloud terminal on the iPad
3.4 Polling the terminal and reprinting the receipt
4.1 Gratuities at the terminal
1. Terminal order & redemption agreement
The Lane-3000 terminal is a LAN terminal which is connected to your router. You can choose a 2m or 5m cable. If your router is further away, you must use extension using a switch.
Contact our support department on DK: +45 71 99 26 24 / NO: +47 23 50 65 90 or support@quickorder.io
If you already have a terminal or redemption agreement, contact us anyway so we can ensure that your setup fits the integration.
2. Setting up the terminal
When you order a Cloud terminal from Nets, they send you a Username and Password. Be sure to save these as they will be used in the setup.
The terminal itself is updated with Username and Password upon receipt, and therefore simply needs to be activated and connected to the Internet.
2.1 Activation of terminal:
The box from Nets includes a terminal, cable and power supply.
The cable can be seen below:
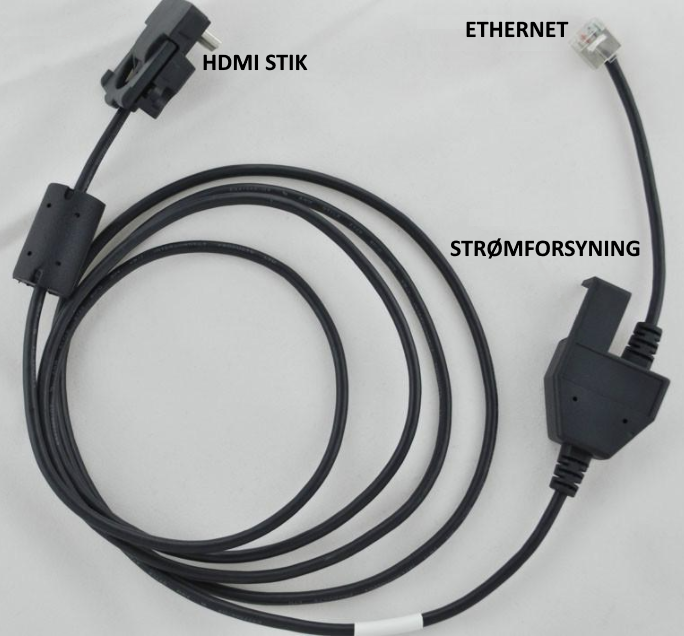
- Install cable in terminal and router. HDMI plug in terminal and ethernet plug in router/switch
- Connect power supply to outlet and above cable
- As soon as the power is on, the terminal starts
You can then start setting up the Integration in your Quickorder back office in the next step.
3. Integration
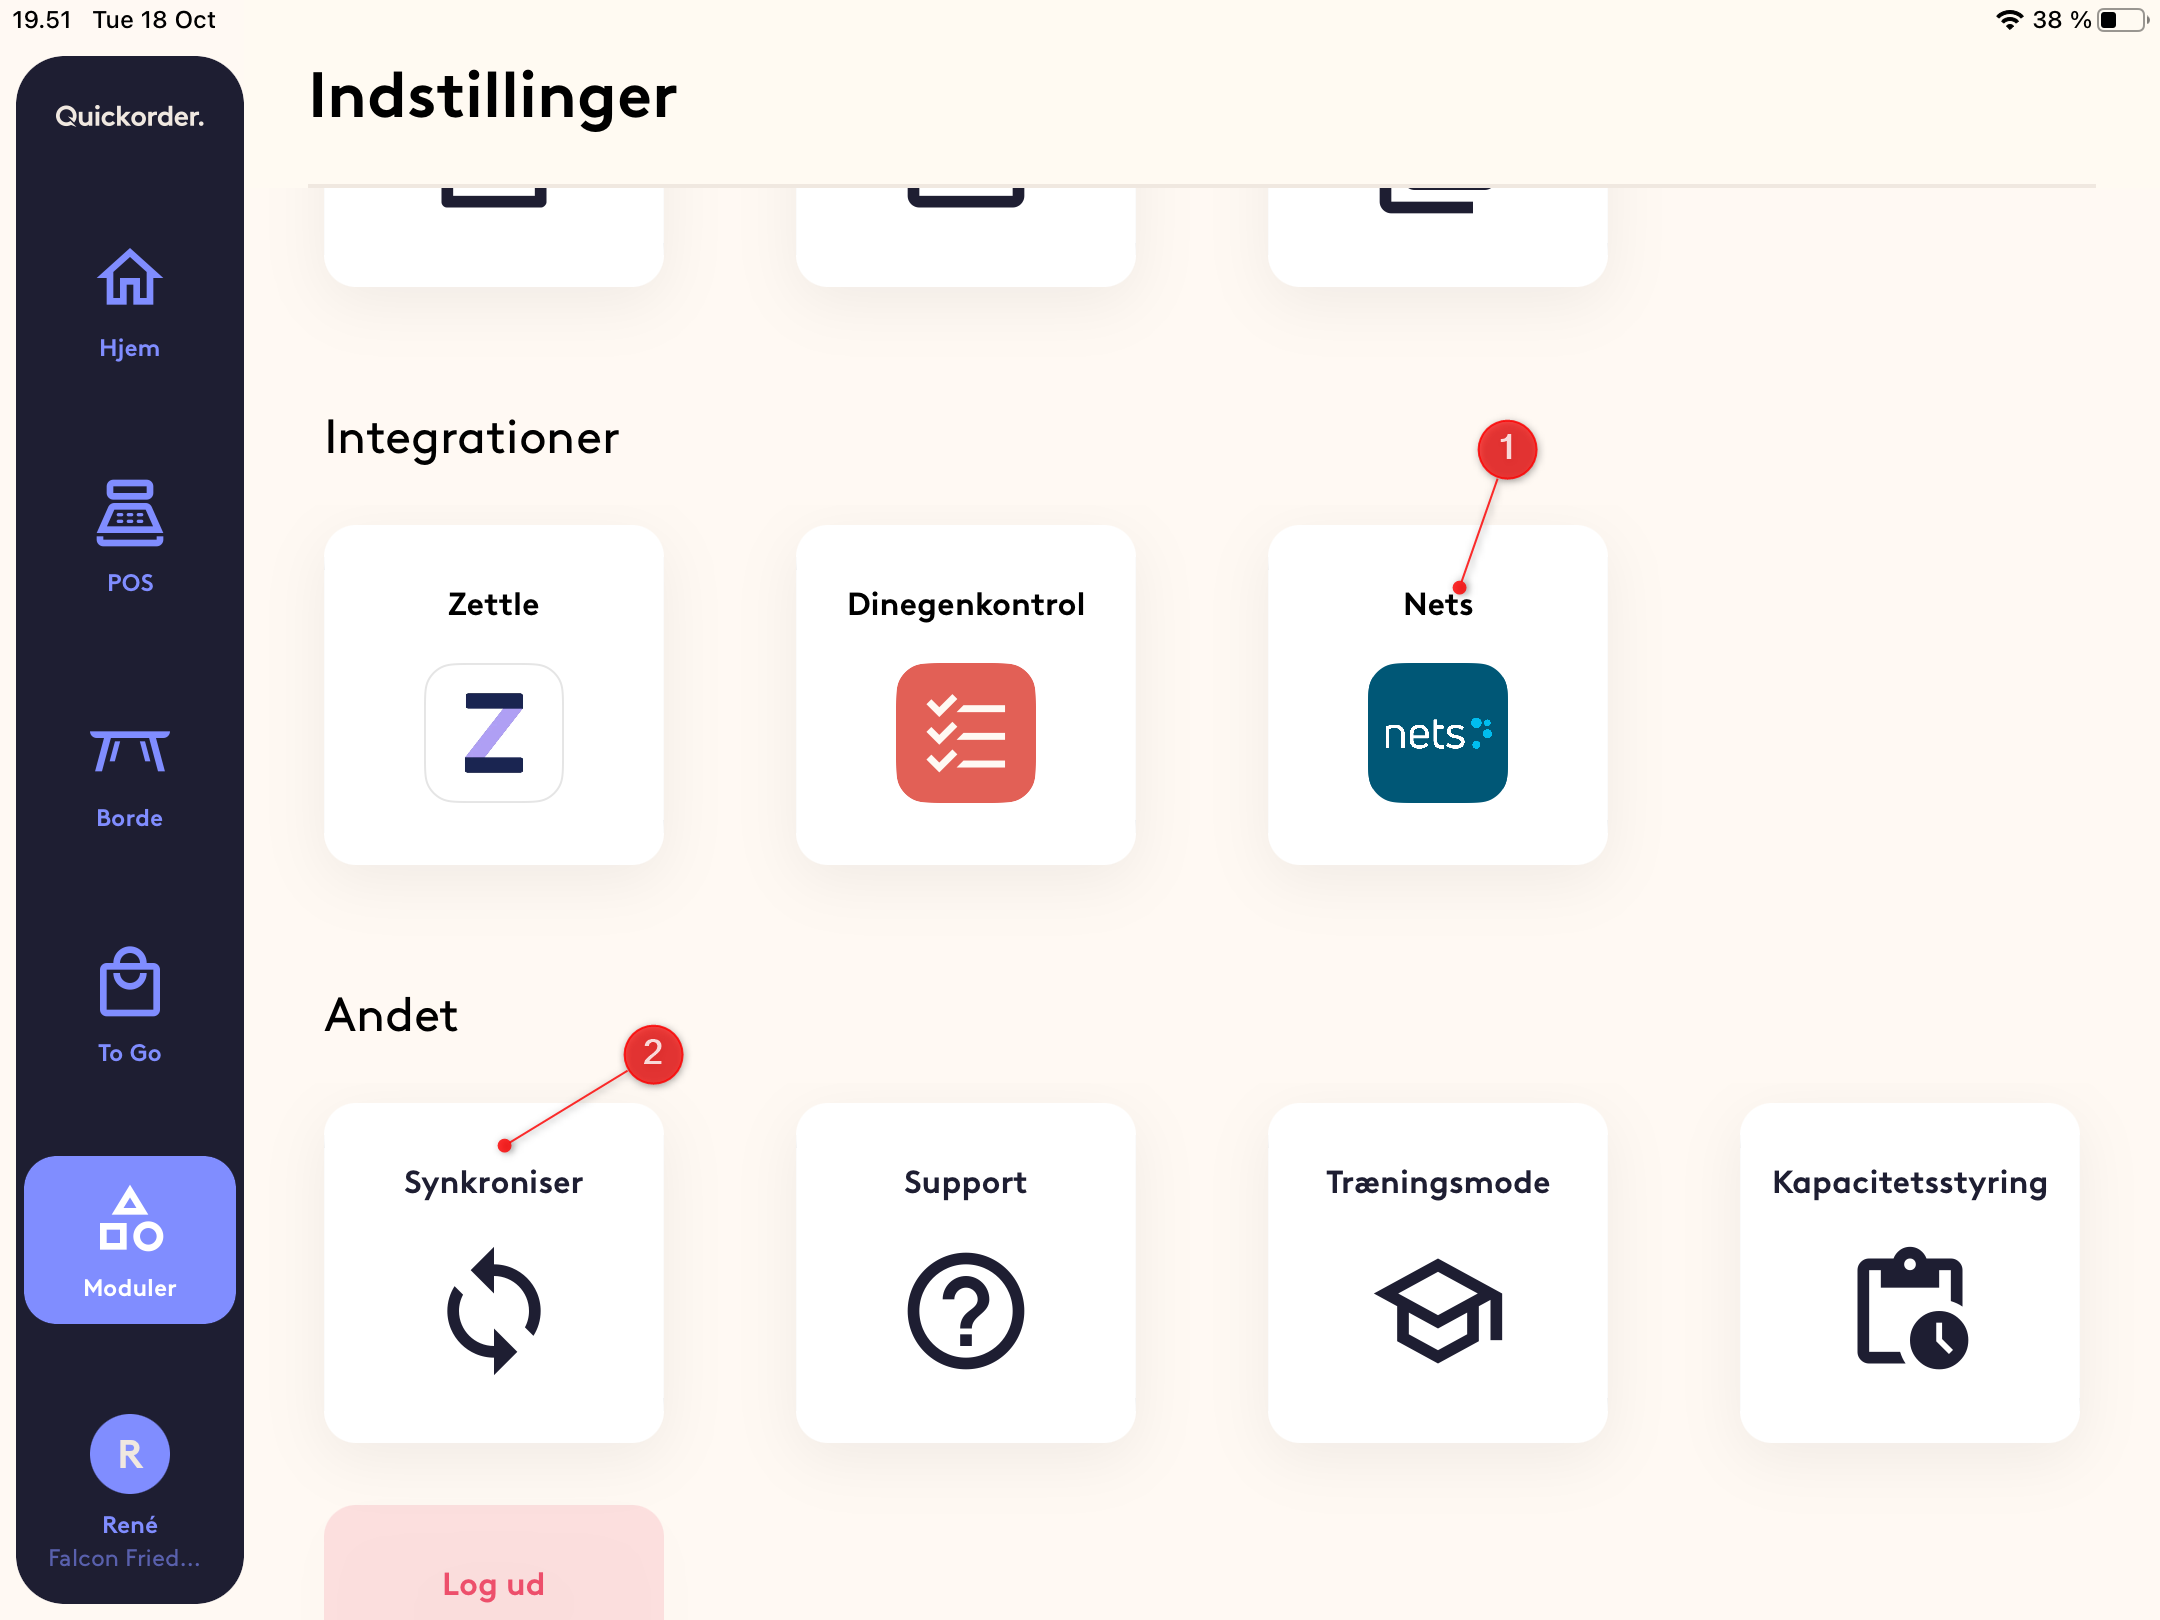
3.1 Setup in Backoffice
In order to use the Nets Cloud terminal, the Integration must be activated.
Tap Settings in the left menu.
Tap Integrations.
Press Connect on the Nets integration (1) .

3.2 Connect your Nets Cloud terminal on the iPad
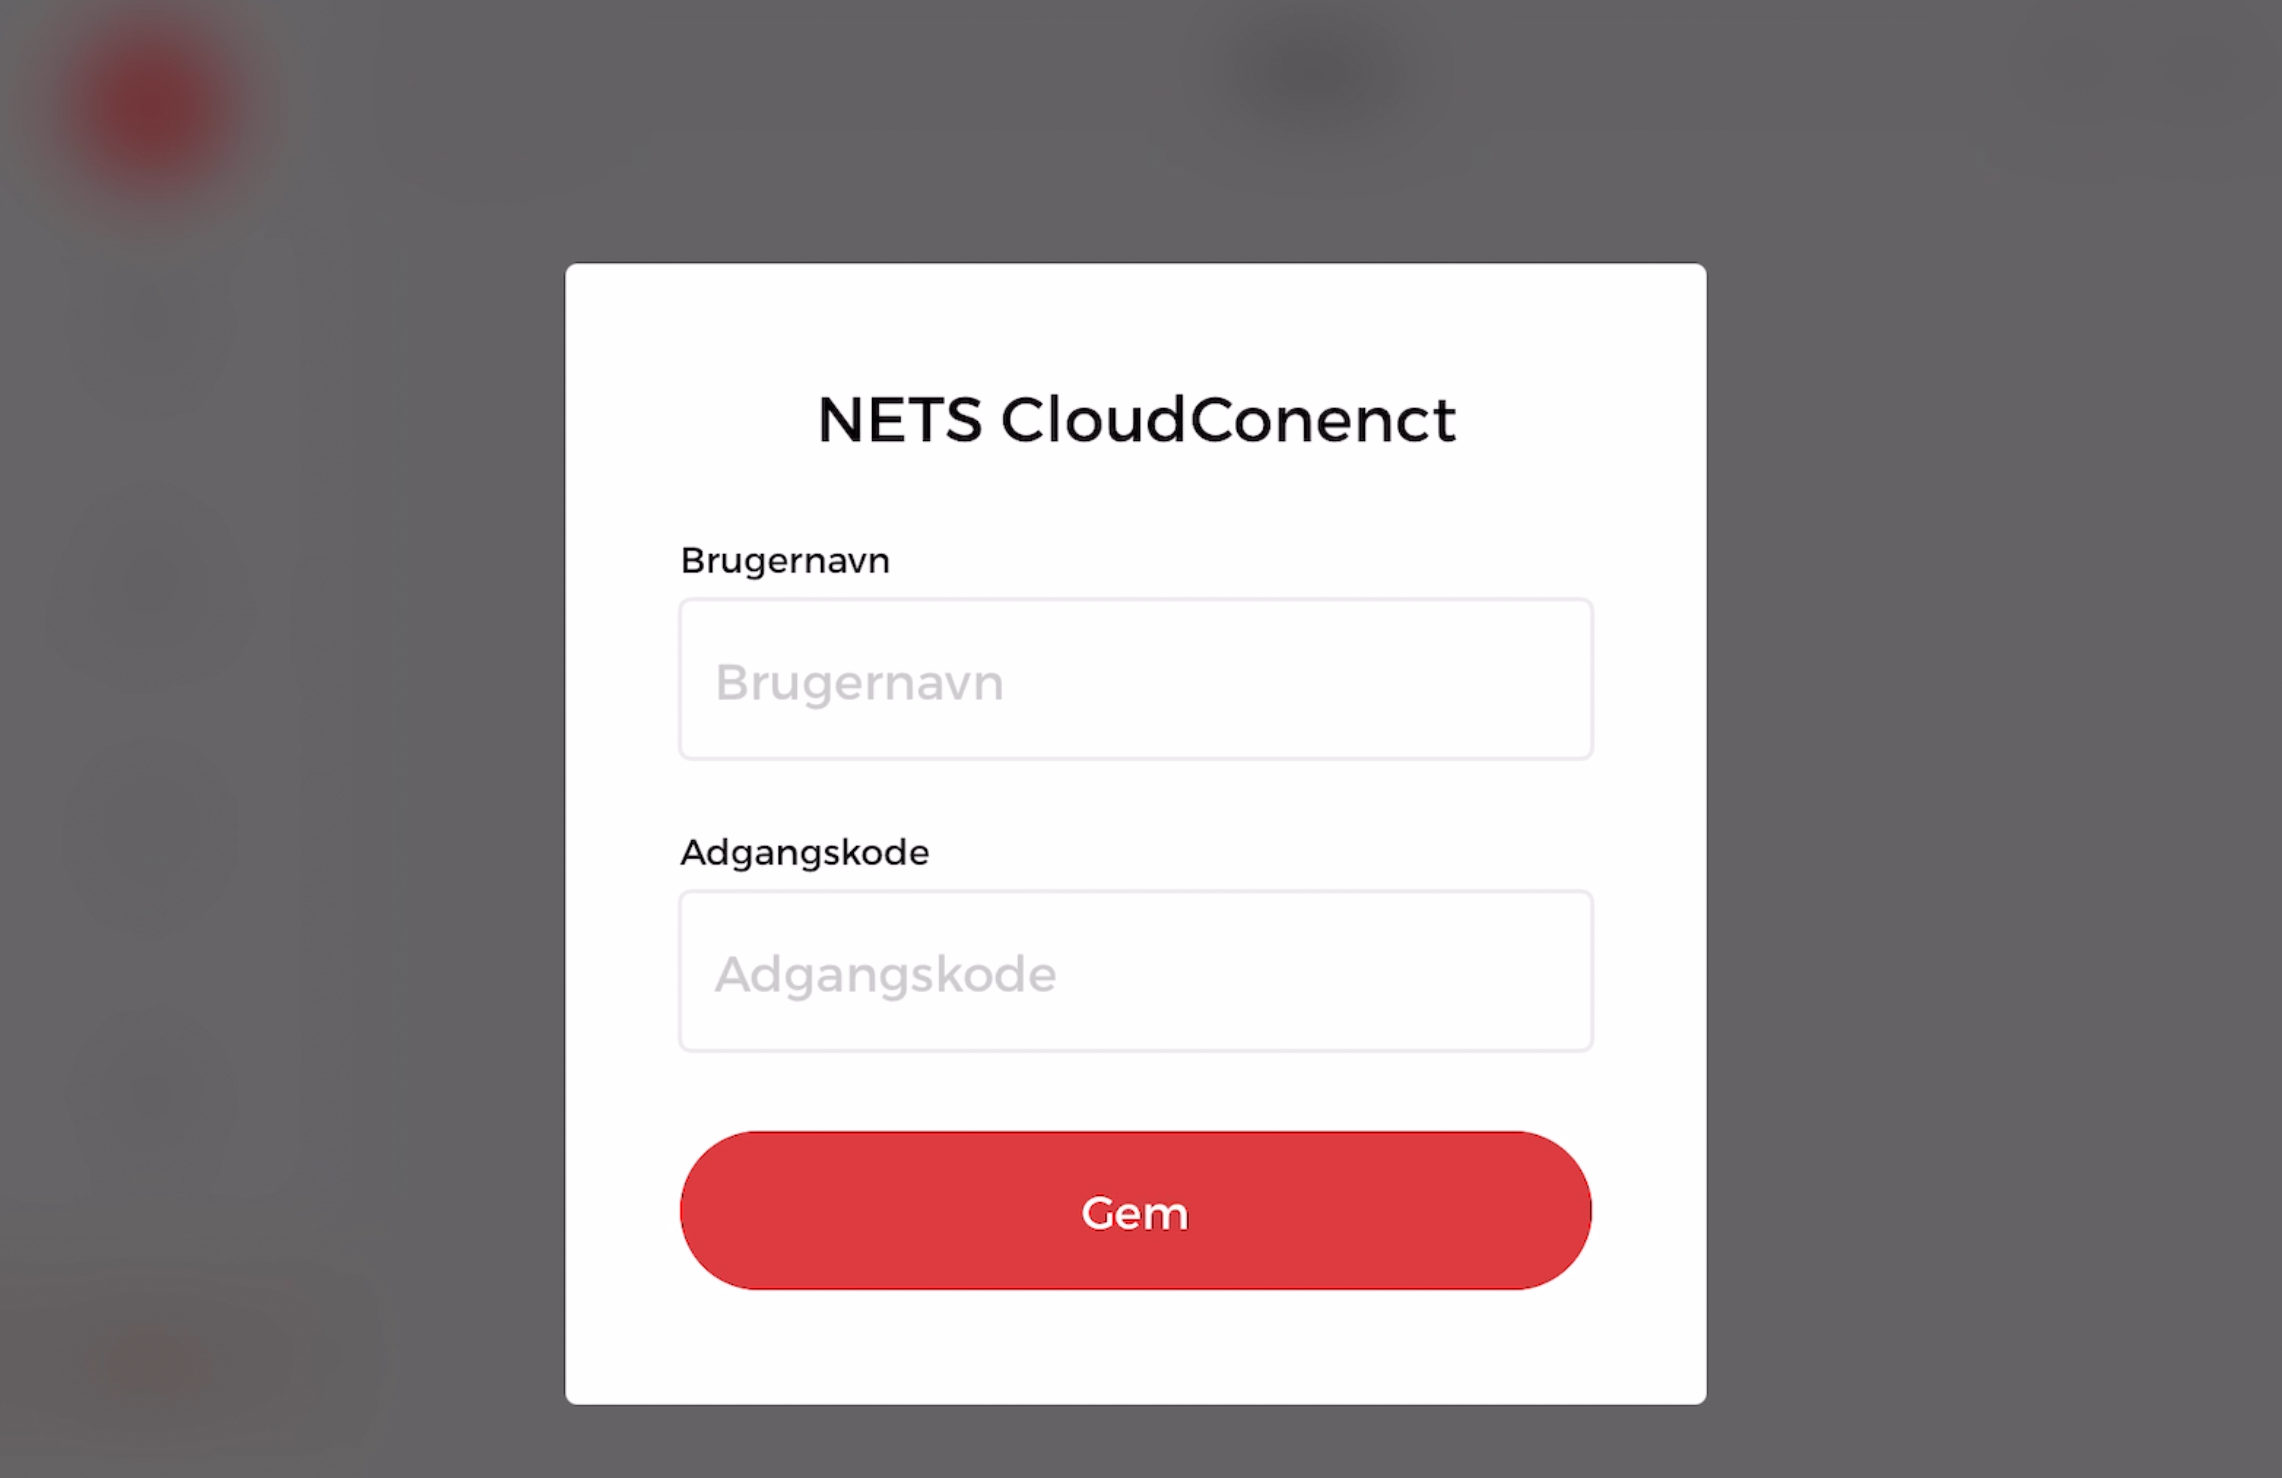
Start by synchronizing your app so that Nets Cloud is enabled as the payment type (1).
You must then log in to Nets CloudConnect (2).
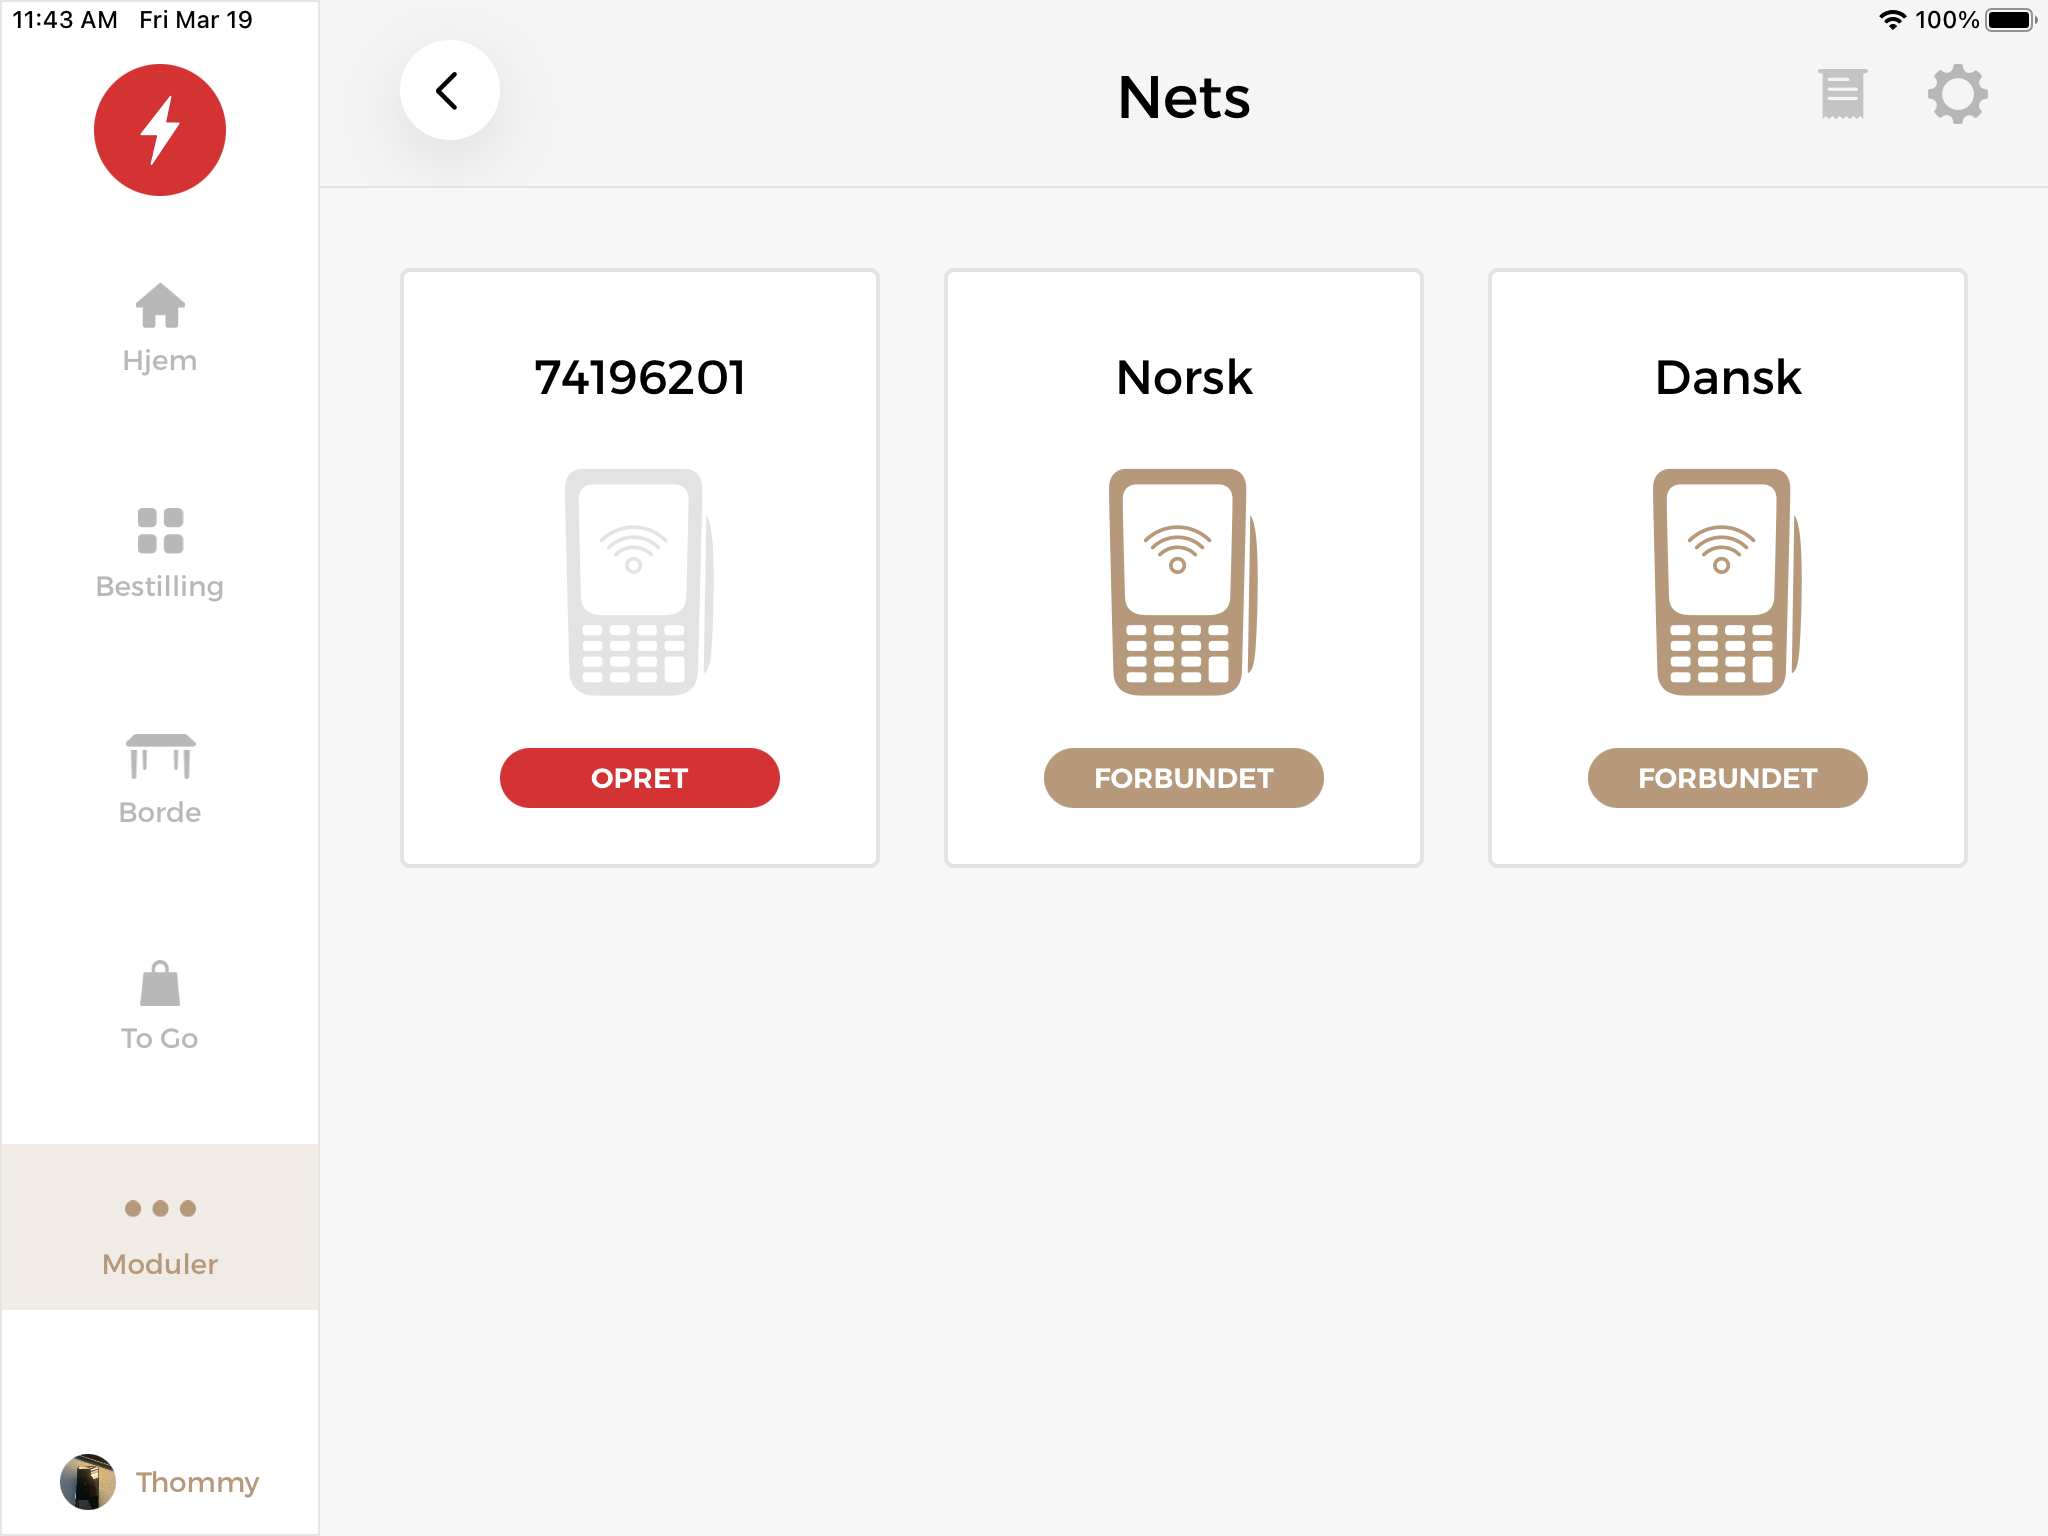
Tap Modules in the left menu.
Tap Nets under Integrations.
Enter the Username and Password from Nets, which were sent in connection with ordering the terminal.
Now the terminals connected to your Nets CloudConnect agreement can be seen, and it is possible to change the name of the terminal and Connect them to be able to receive payment via POS.
QUICKORDER INTERNAL: Update screenshot below
3.3. Setting up the terminal
It is necessary to set up the terminal to be associated with a cash register system ("ECR" = Electronic Cash Register) But with Nets connect@cloud it is not a local IP address that the payment terminal is connected to. But on the other hand a server IP at Nets (212.226.157.243) This is the server Quikcorder POS also talks to and through it the 2 systems are connected to each other.
Step 1
Go to Merchant menu on the terminal -> [6] Parameter -> [1] Change ->
Settings must be set to:
- Comm. type = Ethernet.
- Host IP = 91.102.24.142
- Host Port = 9680
Then check menu item [2] and [3]:
- Menu item [2] Communication is set as follows:
- Comm. Type= Ethernet
- Menu item [3] Box is set as follows
- ECR = Yes
- Comm. type = IP Ethernet
- ECR/TLS = Yes
- ECR IP Addr. = 212,226,157,243
- ECR IP port = 6001
Step 2
Check the settings in the Parameter menu Merchant menu ->[6] Parameter -> [1] Change
- Comm. type = Ethernet.
- Host IP = 91.102.24.142
- Host Port = 9680
Step 3
If it still doesn't work after the above, then do the following:
Go to merchant menu -> [1] Card deals -> [1] Get deals
3.4 Reconcile the terminal and reprinting the receipt
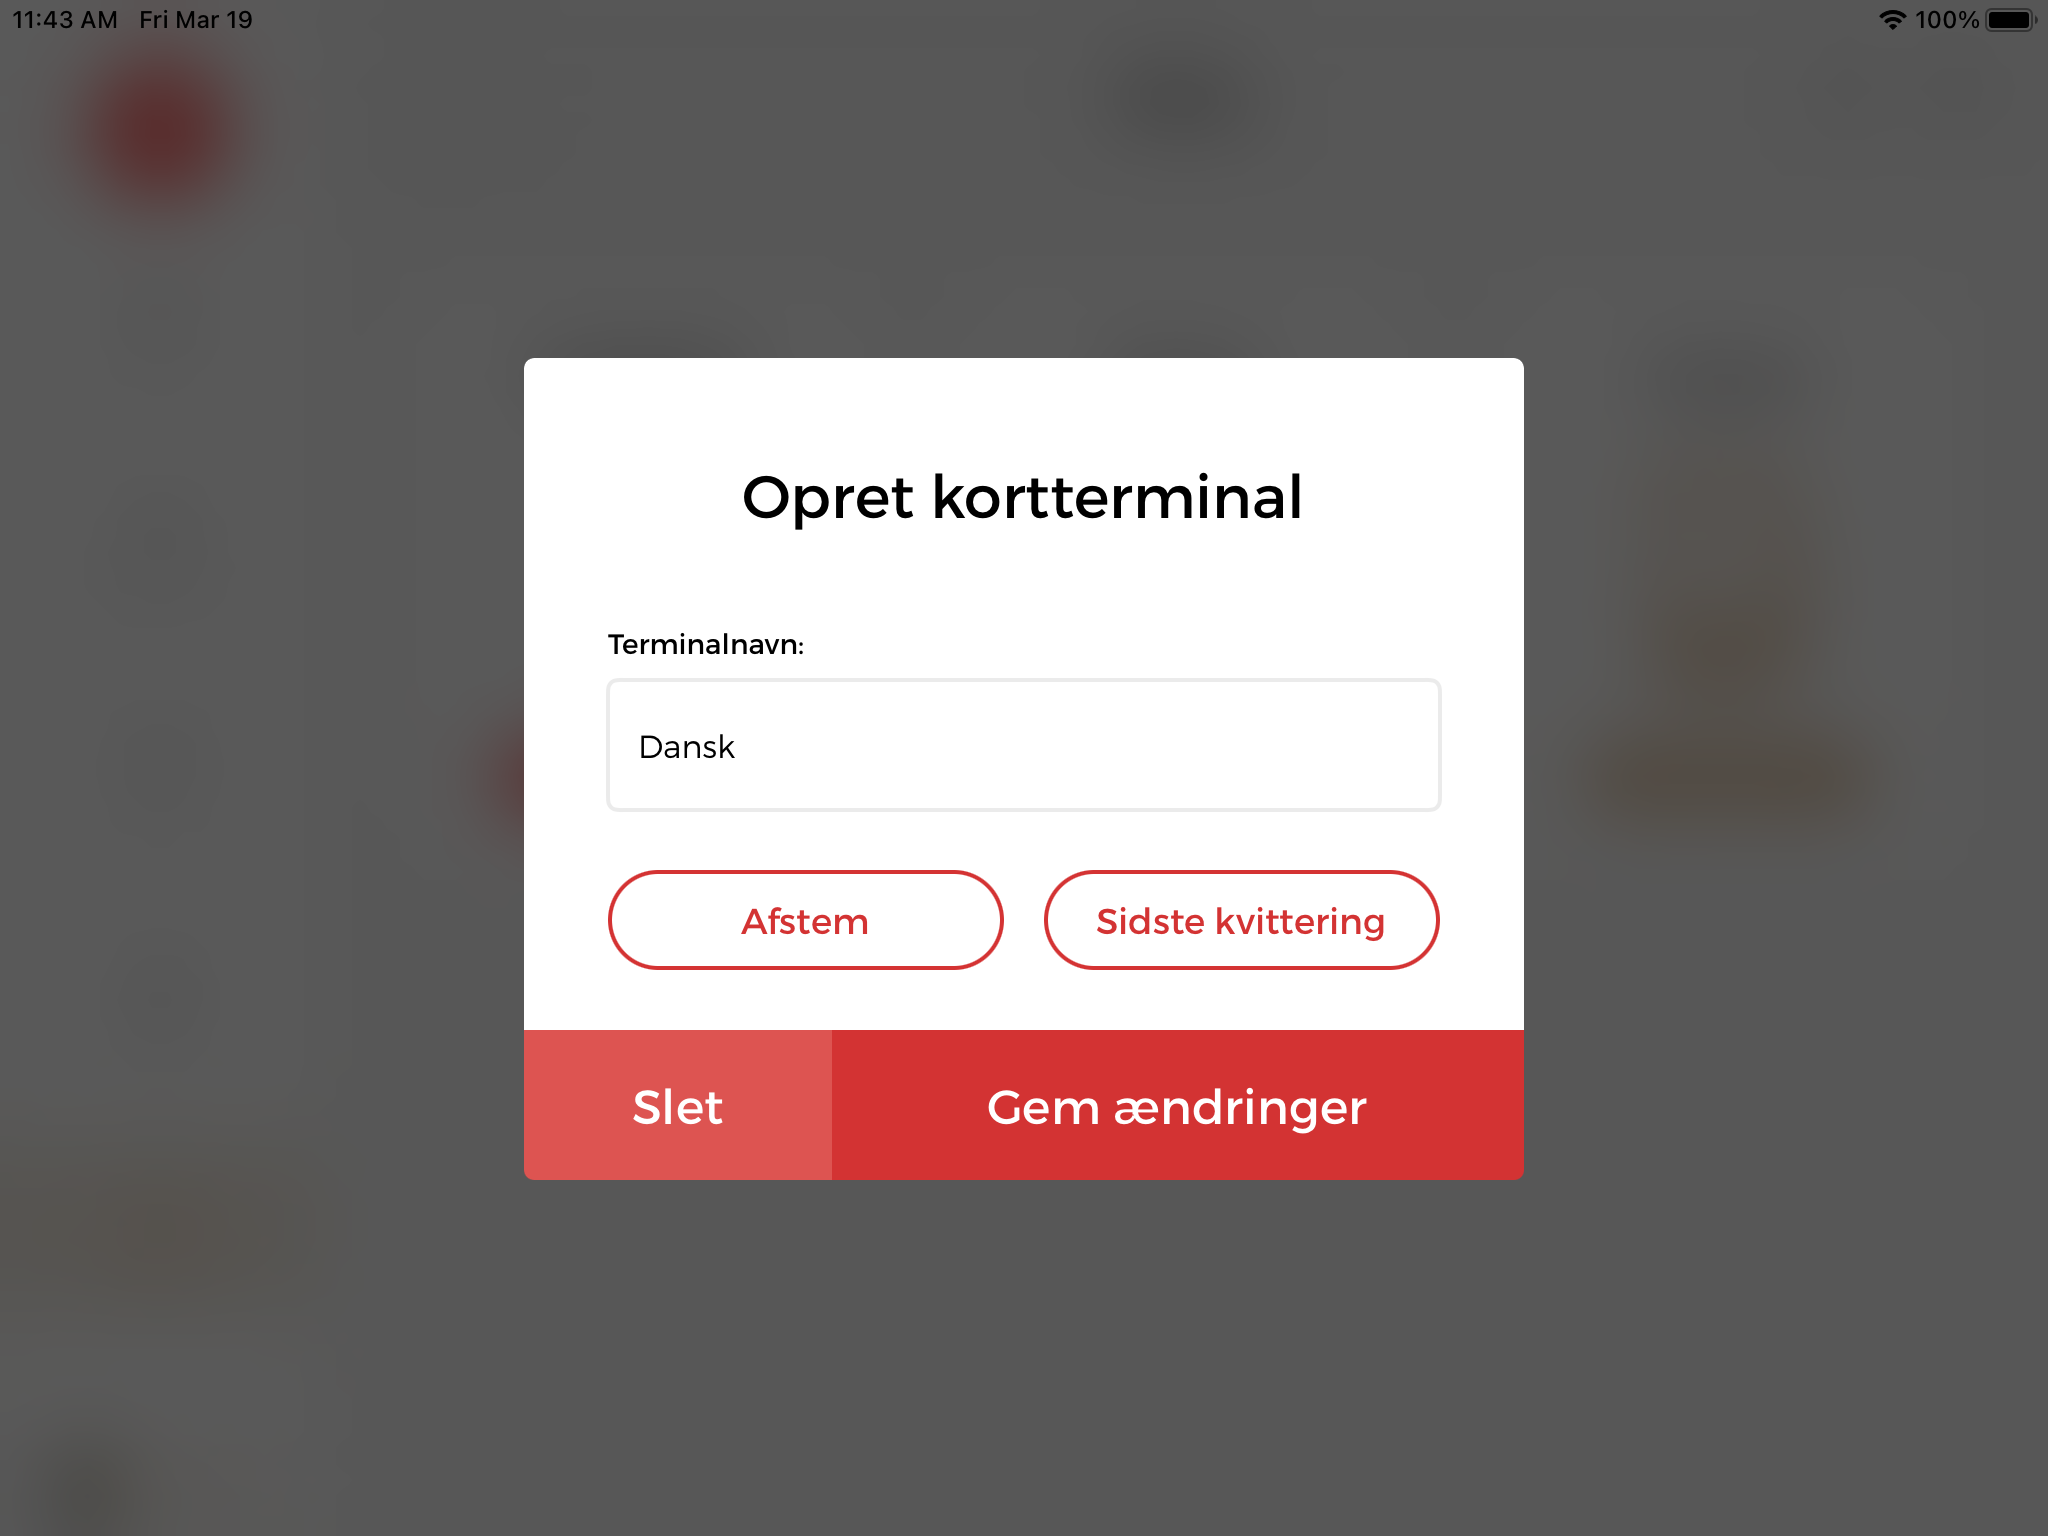
When a terminal is created or has already been created, it is possible to change the name of the terminal.
It is also possible to reprint the last receipt from the terminal.
3.4.1 Reconcile in POS
Go to
- Modules
- Integrations
- Nets
It is possible to reconcile your terminal from the terminal itself, BUT if you want a receipt from the POS, it must be done in the POS by selecting the terminal you want to reconcile.
3.4.2 Manual reconcile from the terminal's menu
- Press the [Menu] button
- Swipe the Merchant card
- Select [6] Reconcile
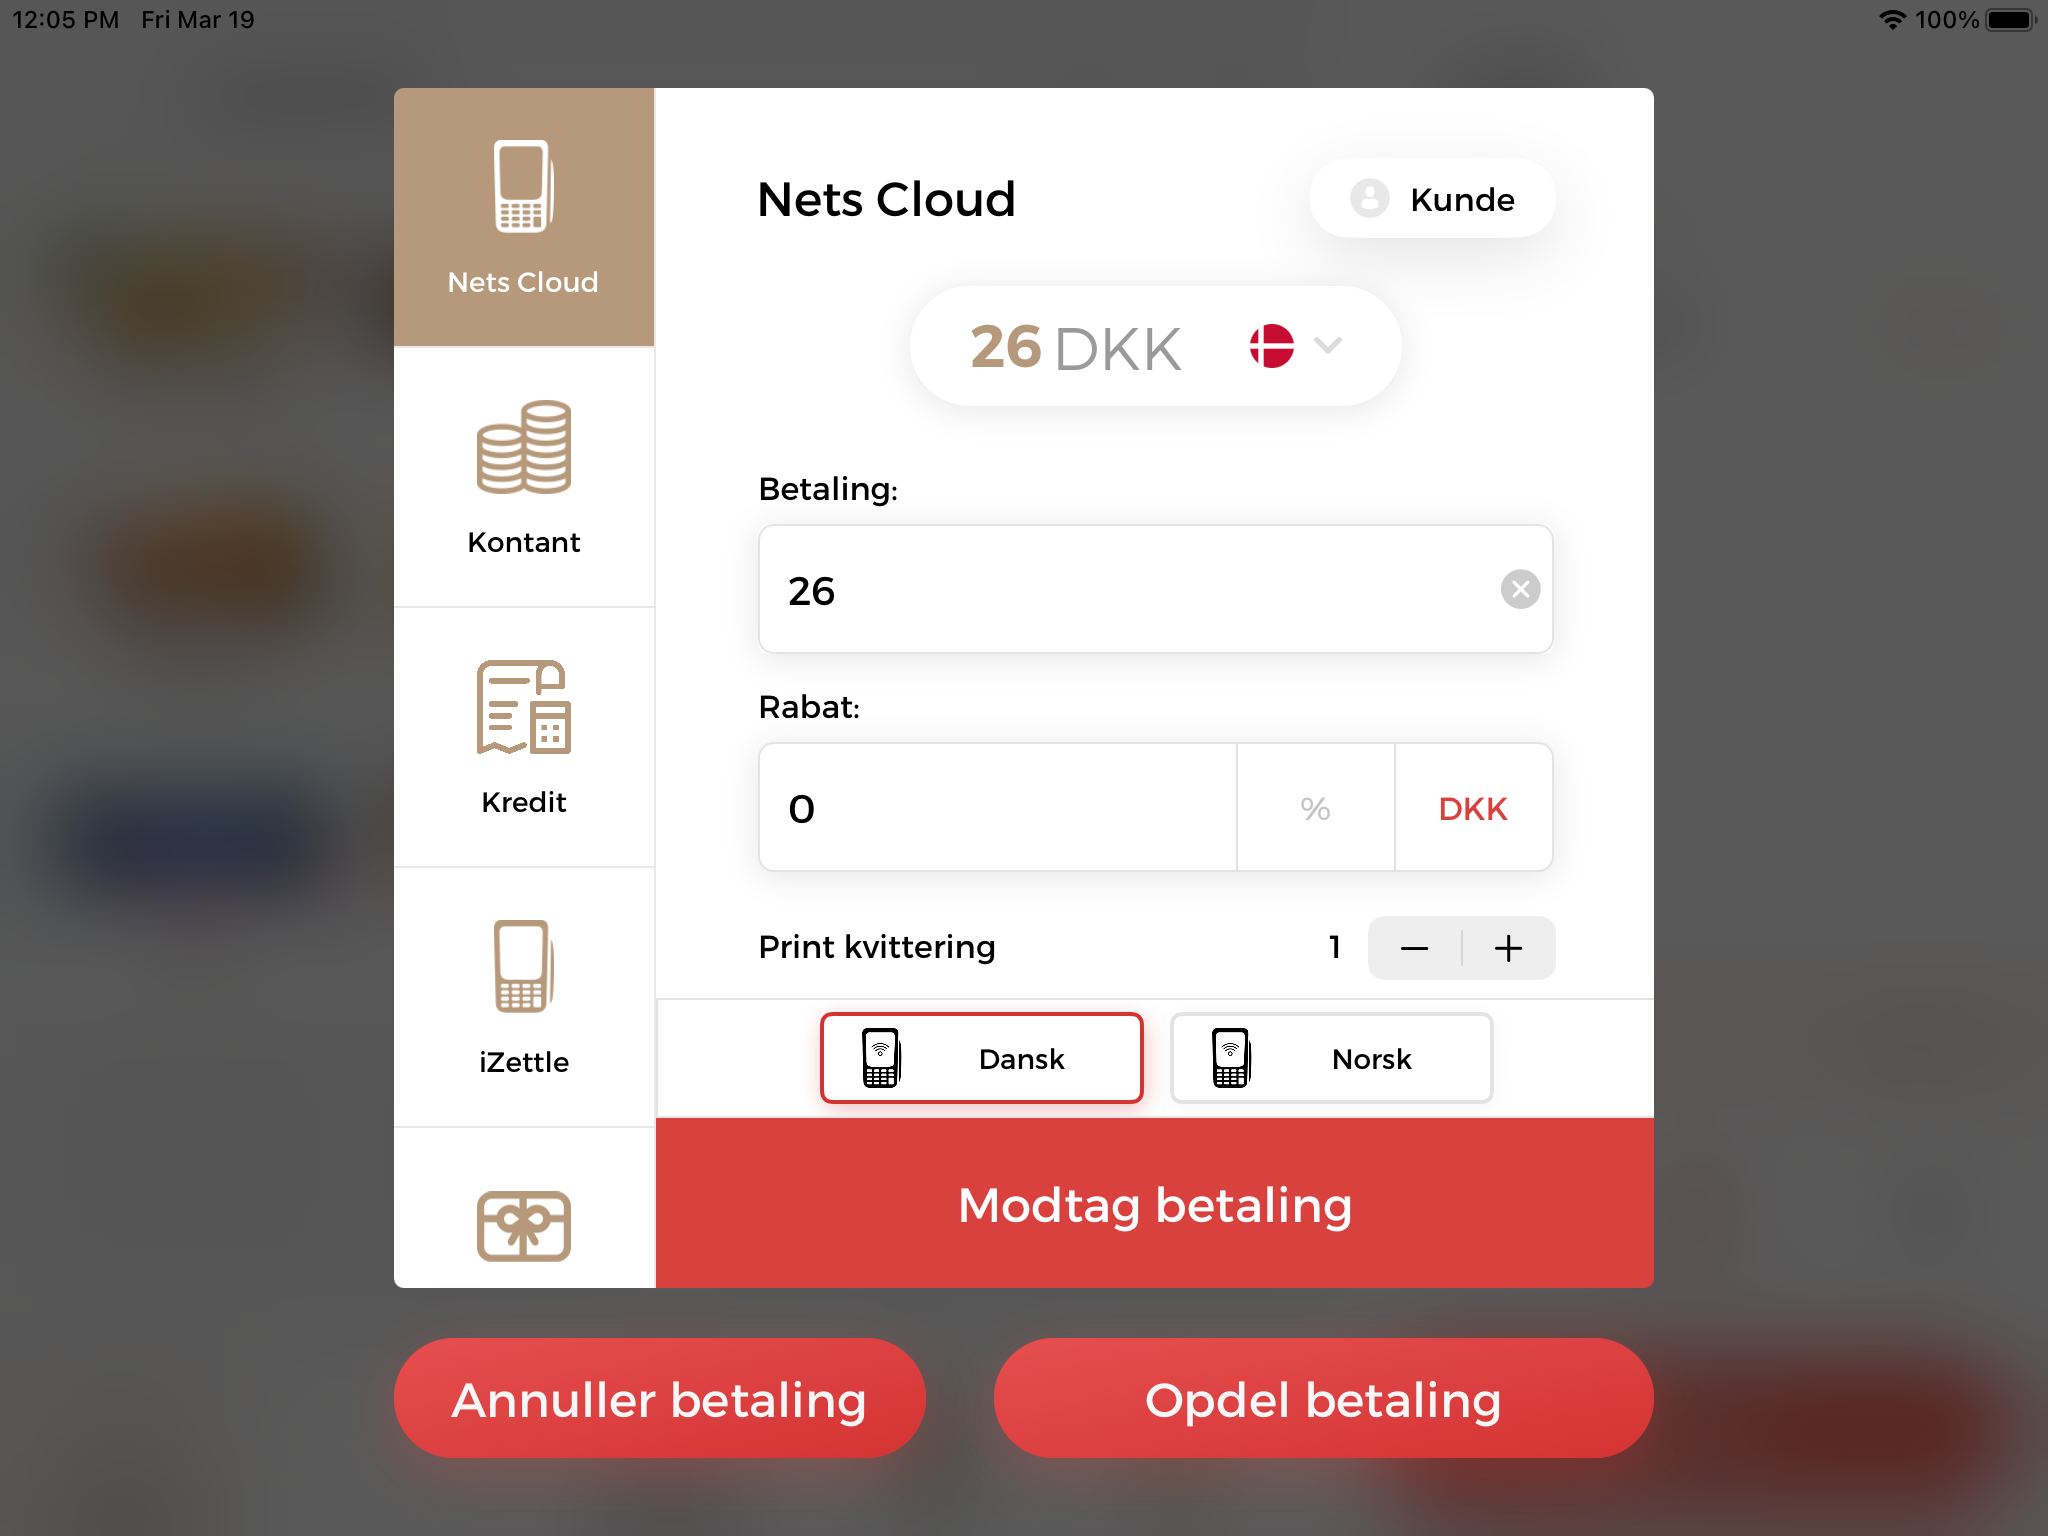
4. Payment with Nets Cloud
When a payment is to be made with a Nets Cloud terminal, Nets Cloud is selected as the payment type in the payment window, and the relevant terminal is selected if you have several terminals.
4.1 Tips at the terminal
The tip function must be activated directly on the Nets terminal.
This is done by:
- Open the terminal's "Function menu" (MENU-8-1-1)
- When the "Functions menu" is opened, use the terminal's ARROW keys to scroll down to the "Tip" menu and press the Green key.
- When the "Tip menu" is opened, use the terminal's ARROW keys to select the correct Tipping function and press the Green key to activate it.
- Once the function is set, press the Red key a few times until the terminal restarts.