Table of contents
1. Connect the integration2. Set up product types
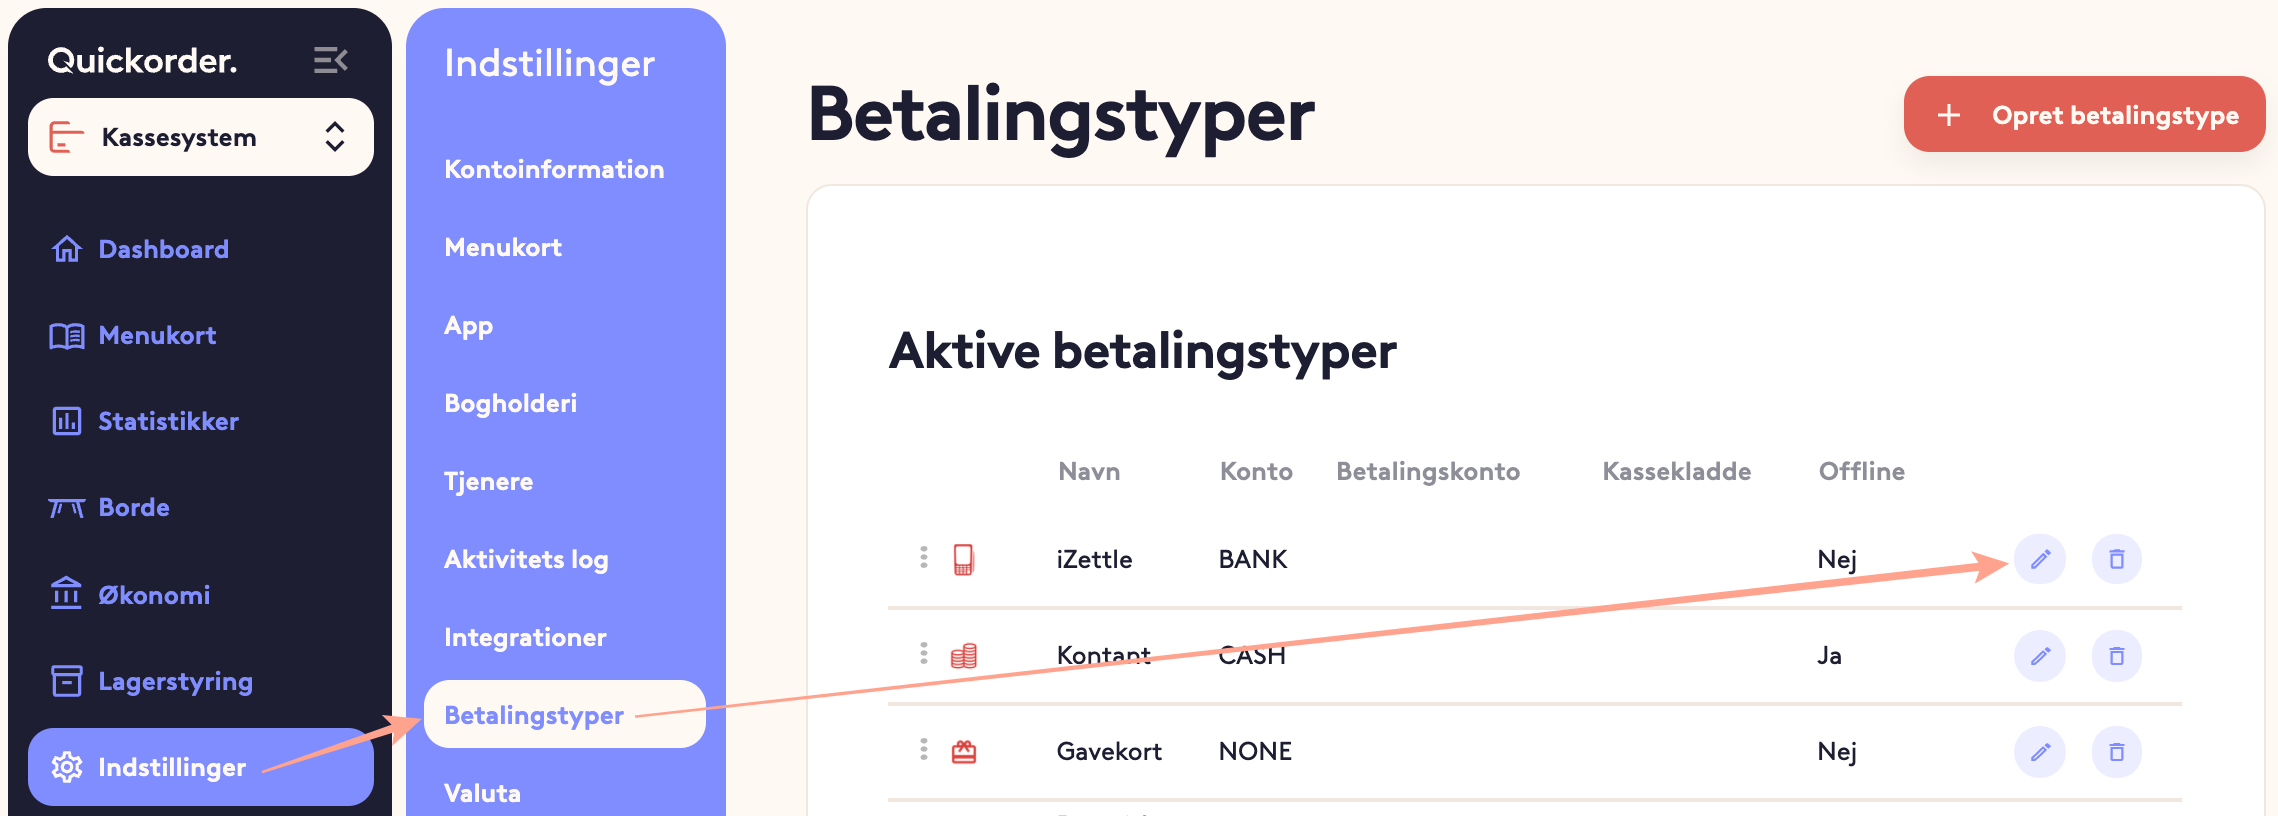
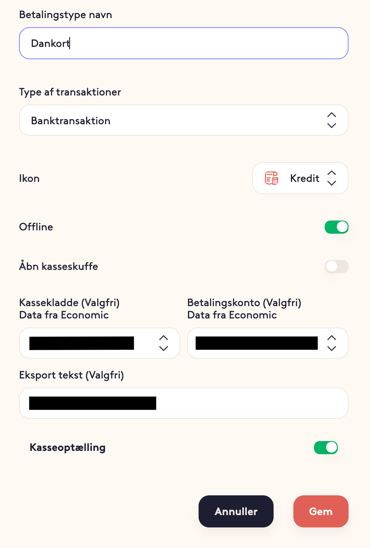
3. Set up payment types
4. Set up VAT codes
5. Restrictions in the integration
6. Good advice and tips
7. Gift card sales
1. Connect the Integration
- Open the internet browser and log in to pos.quickorder.io
- Go to Settings > Integrations and tap Connect
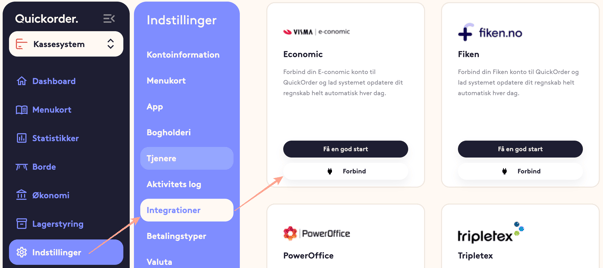
- You will now be sent to E-conomic to log in. Select the correct company
- When this is complete, you will return to the Backoffice and can therefore set up the integration
2. Set up Product Types
- Under Settings > Menu card > Product types , press the small pencil next to each payment type
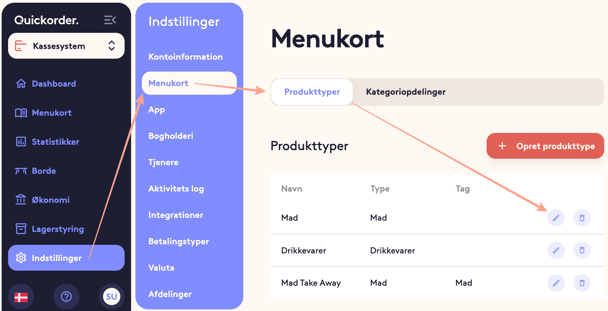
- For each product type, indicate which account in E-conomic where the revenue for the relevant product type must be posted
NB! Please be aware that the revenue is entered as a credit and that the account must therefore be in the profit and loss account as a starting point. Consult an accountant or bookkeeper if you are in doubt
- Tap Save
- Repeat the above with the remaining product types

NB! Please note that not all receipts can be used in E-conomic. As a starting point, the "Daily" journal can be used, while "Deposits" and "Salaries", for example, cannot.
If you create a cash journal specifically for the cash register system, you must be aware that if you choose a number series that does not start with 1, that you must indicate the next attachment number to a number in the number series. E-conomic itself provides voucher numbers based on the number series on the individual line
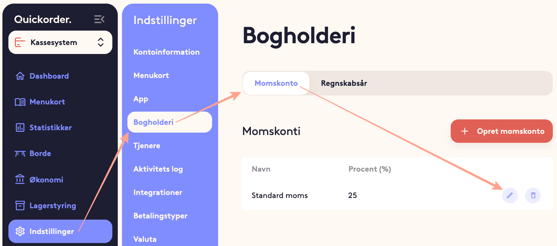
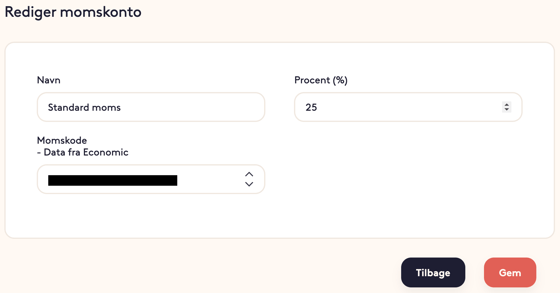
4. Set up VAT codes
- Go to Settings > Bookkeeping and tap the small pencil
- For the individual VAT account, set up the VAT code that fits in E-conomic
Press Save
NB! Please note that the VAT percentage must be identical to the rate used in E-conomic, as otherwise differences may arise
5. Limitations in the Integration
Please note that the figures exported (both CSV and the direct integrations) have some limitations that must be taken into account manually:
- Tip
- Tips are not included in the export and must therefore be entered manually.
- Cash differences and Movements
- The cash register and the movements it produces are not part of the export. These can advantageously be booked based on the voucher, which is created when the cash register is closed.
- Cash sales are of course transferred.
6. Good advice and tips
Be sure all corrections are made before transferring to the financial system. If you discover an incorrect setup (for example, a wrong account on a product type), then in many cases it can be easier to counter-post the old postings and transfer again.
Always make sure to reconcile the numbers you have in QuickOrder with what you have registered in your bookkeeping at regular intervals. It is very time-consuming to correct differences afterwards.
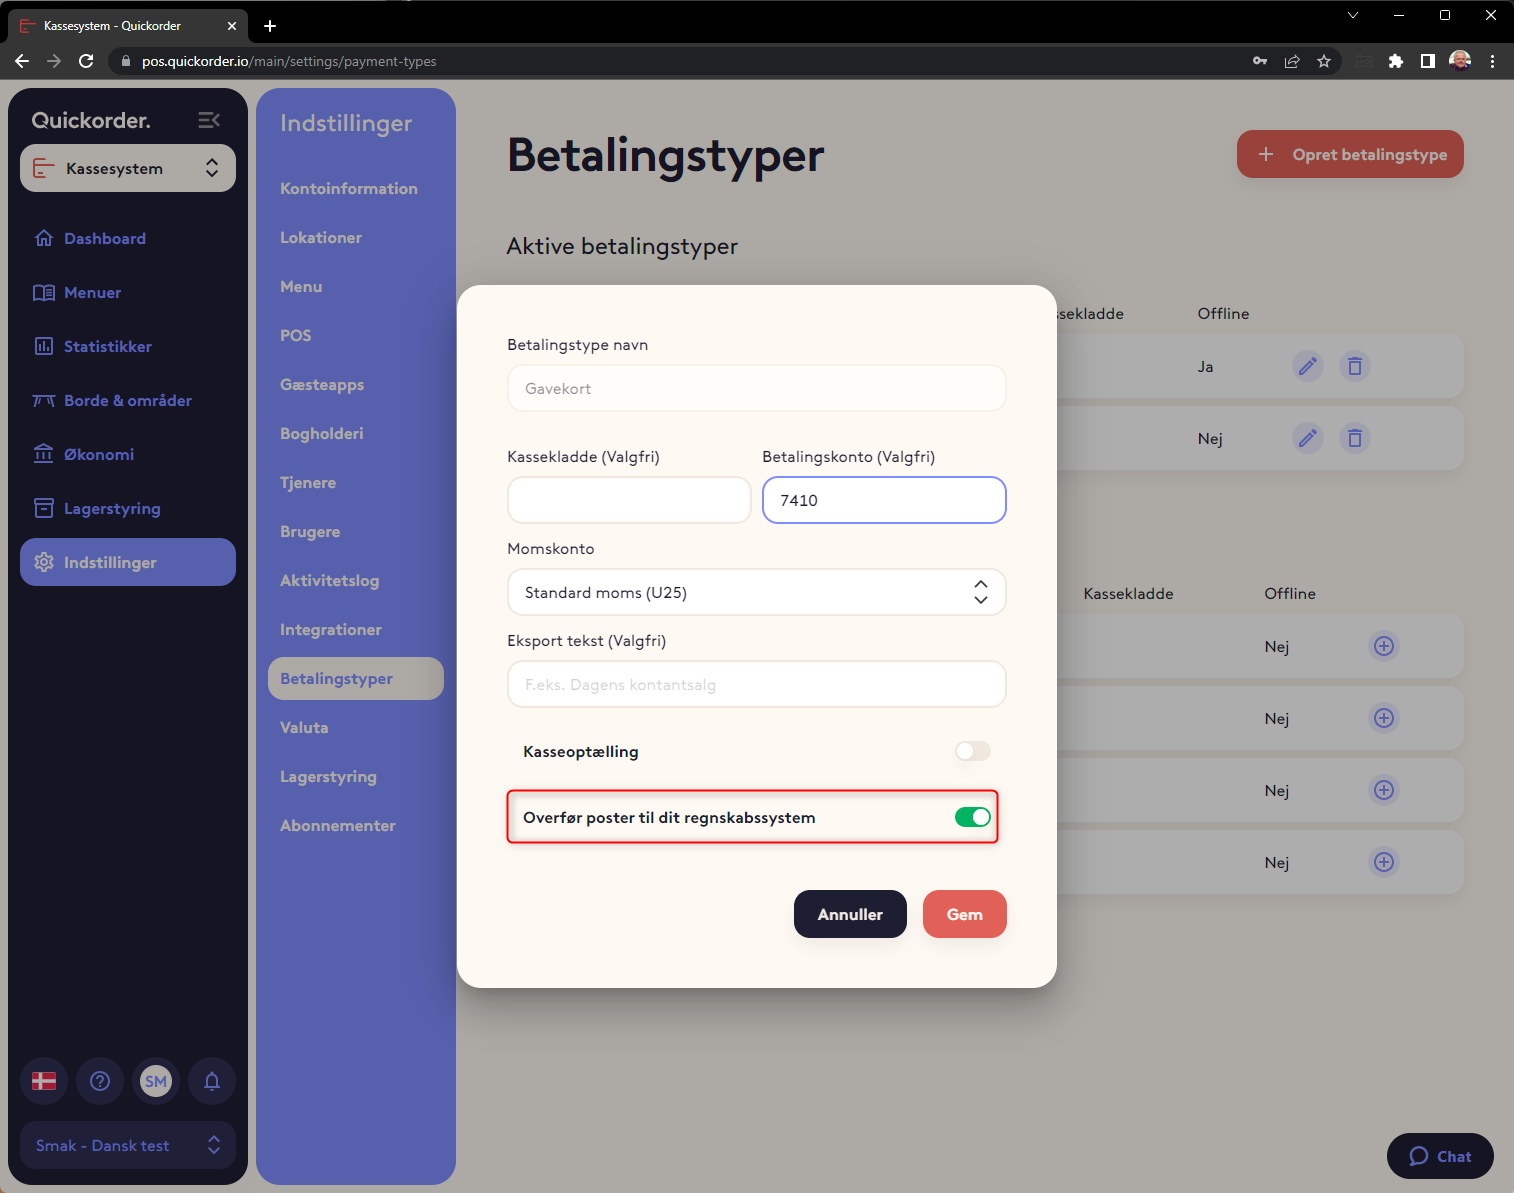
7. Transfer of gift card sales and turnover with gift cards.
In order for gift cards to be transferred, it is necessary to activate this
- Go to Settings -> Payment types
- Select the pencil on "Gift card" and make sure that transfer to accounts is switched on
Congratulations! You have now set up the integration for E-conomic! 🤩